Since my Wilding Wall Bed is my favorite project lately, and since I have had several questions about it, today I want to give more information about their DIY kit. To those of you who are not familiar with what a wall bed is (also called a murphy bed) it is basically a bed that is stored in the wall. It is great for small spaces or a guest room. A wall bed makes it possible to have a bed on hand for visitors when you don’t have the space for it 100% of the time. I have visitors all the time, in fact my brother and sister in law are here right now staying at our house. 🙂 I love visitors.
When you order a DIY kit from the amazingly nice folks over at Wilding Wall Beds, you can expect to get a two large boxes and one small box shipped to you. The boxes come with everything that you need to assemble your wall bed. It includes the wood slats (which you choose the wood type upon order), the hardware, and a few tools needed that you probably don’t have on hand.
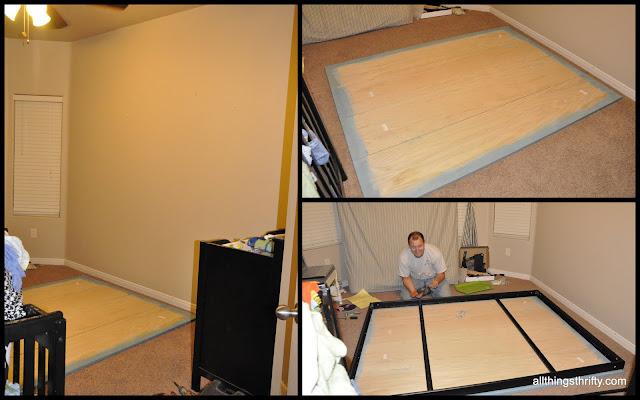
You start by applying the wood edging that comes in a roll with your DIY kit. It is very easy to apply with a hot iron along the edges of your wood. The instructions are great and indicate which edges you want to finish with the edging strips.
After the glue dries, the kit includes a tool to shave off the excess edging strip material to make sure it is flush with the rest of the wood.
After we applied the edging strips, we white-washed the wood with color. I explained why and how I did this in a previous post about white-washing wood.
Then we began the assembly process. The folks at Wilding have amazing instructional videos that demonstrate how to put together the wall bed kit. We had a my laptop in the room while we put the bad boy together. It was very simple and the videos are broken up into steps.
My advice? Make sure you have a studly/hot/handsome man to help you with this process. 🙂 It definitely requires two people. We watched a few of the videos several times, but that’s the great part of having the videos readily available, you can watch them as many times as you want.
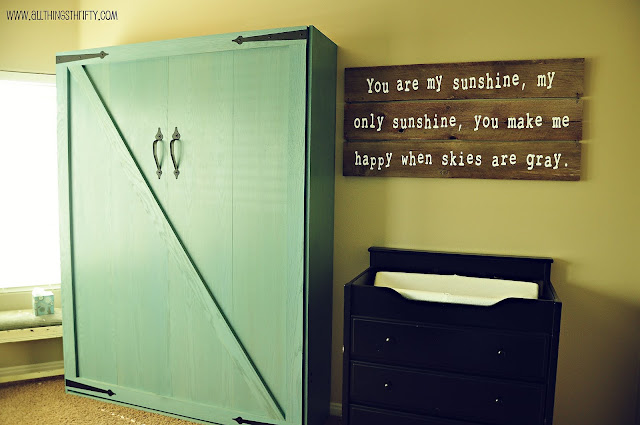
After the kit was complete, we added the decorative slats and hardware to make the wall bed look like a barn door, this was not included in the kit, we bought the slats at Lowes and bought the barn door hardware on Ebay.
Check out the room with the wall bed.


Oh. My. Gosh!! This looks great. I am loving that the hardware didn't come with the kit. I am so happy to find out that you bought the hinges and handles at Lowes. I have wondered if those were out there because I want to put them on my garage doors to give them a "faux" carriage door look. So – what department did you find them in or what brand are they/what did the label say? I am ready to run to the store to get some! Thanks!
In case my e-mail isn't linked
twentysomethingtransue@gmail.com
twentysomethingtransue.blogspot.com
Thanks 🙂
Do you really need the kit or is this something that can be one step further DIY?
I would not try doing a murphy bed without the official hardware. The bed is so heavy, especially with the mattress on it. If it fell, it could kill a child. I'm not exaggerating. Since I have four young children, I was afraid that one of them would try and pull the bed down. The hardware makes it easy to pull the bed down, and it prevents it from falling too fast. I would possibly try to build my own frame, but I would not suggest to make one with out official hardware.
This is great! Thanks for the links and the suggestion. I am going to start saving my $$ because this is the best deal I have seen so far.
Hi Brooke,
I love the color of this bed! I was curious what type of wood the bed is and what brand and color of finish you chose??
Thanks!
Suzi
qnob@yahoo.com
@Puddlefoot
Look over this post and see if it answers any of the questions you had!
Good Luck!
WhiteWash withColor
I blog quiote often and I genuinely thank you foor your content.
This article has truly peaked my interest. I’m going to book mark your website and keep
checking for new details about once a week. I subscribed to your Feed too.
does this fit any queen size bed?
Yes! I think they have specifications on their website, but our mattress is pretty deep and it fits great!