Yo, yo, yo!!! Good morning sun-shines!! I hope you had a wonderful weekend! I got to go home for the weekend to my tiny hometown in Central Utah called Holden. Remember when I showed you the fun wedding proposal idea a few weeks ago?!? Well, I got to give Carrie {my brotha’s lucky fiancé} a bridal shower this weekend with my Mom and sisters. It was really fun, and she is absolutely AMAZING. Of course we {my sisters and I} had to hook her up with some lingerie for her honeymoon! Ha ha. It was quite fun. She even opened it in front of the whole fam-damily. She took it like a champ. She got to meet a lot of the extended family this weekend too, and I kept joking with her that I was going to give her a quiz at the end of the day!
Enough about me, are you excited to see the faux brick project transform!?!? I’ll tell ya what, I am really excited to show you how we painted our faux brick panels! If you missed Part 1 of our Faux Brick Panel project, you should check it out!


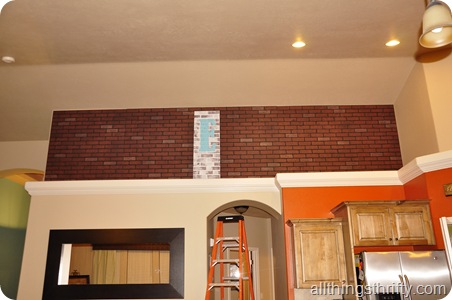
After we installed the {faux} brick panels above the plant shelf in my kitchen, we took a small piece of the left over paneling and practiced on a test strip. I wanted to make sure that the vision was going to look right. I went to work on a small piece of the faux paneling. After I got done {Yes, I will show you step by step instructions in a little bit}, I stuck the small test piece up on the plant shelf to see it from far away. It was perfect. I painted the letter “E” on a panel as a test also. The original “vision” included a painted word onto the brick, but we have changed the plan. 🙂
Step 1: Paint the grout lines white. If you remember the inspiration pictures from Part One of this project, you will remember that the grout was white in all of my inspiration photos. So, I took a small paint brush and began painting the grout. The painted lines were not exactly even, but that was the point since I wanted to make the brick look OLD. I used Kilz primer because that is what I had on hand.

 Just keep painting….just keep painting…just keep painting, painting, painting!

I think you will agree that it already looks a BA-DILLION times better with the grout painted white! It brightens it up a TON!!
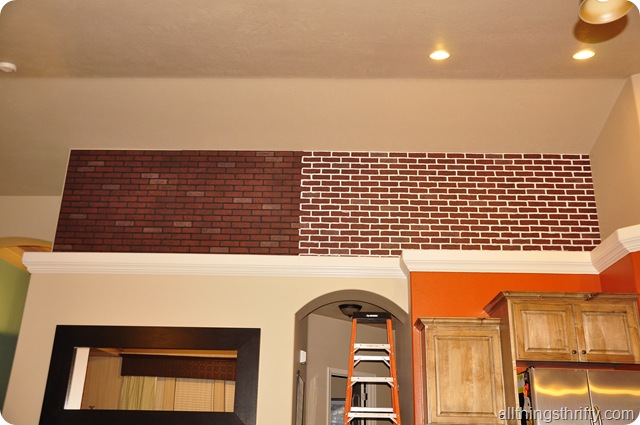 Take note that we painted the panels AFTER we had installed them. We decided that in order for the panels to look like a continued wall, we needed the paint to be continuous. So, if we would have painted the panels and THEN hung them, we would not have achieved that continuous look we were going for.
I did the best I could, but when it came down to the last little bit, I had to call in the hubs to finish for me. I was a little freaked out by the end. I’m a tiny bit afraid of heights!
 I already liked it WA-AAAAAY more after the grout was painted, but oh no, we are NOT done yet!!
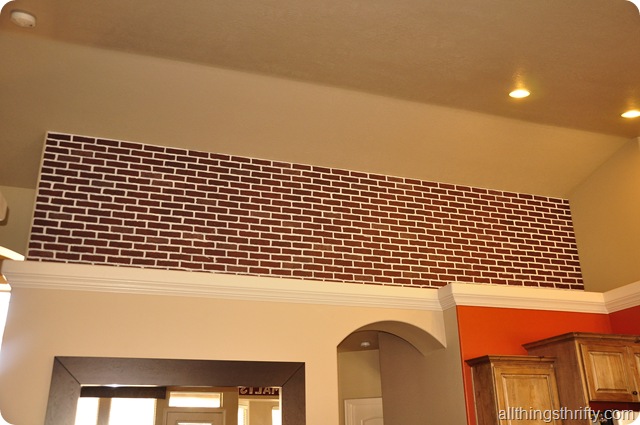 Here is a little reminder of what it looked like before we painted the grout lines!
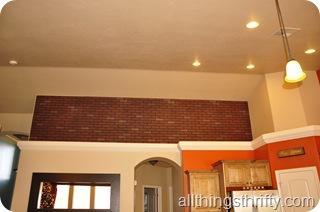

Step 2: Start dry brushing on the white paint. I dipped my brush into the white paint and wiped off a lot of it onto a dry cloth. Then I would brush on the white paint with the dry{ish} brush. (See video below to see details).
 I wanted the white to look slightly uneven to achieve the look of the inspiration photos {once again}. If I got a little too much paint on the brick, it wasn’t a big deal because I had a water bottle and a cloth that I could spray it right on to thin out the white a little. The hardest part about this part was that I could not see the BIG PICTURE. I couldn’t tell what the heck it looked like from below! That was nerve racking.
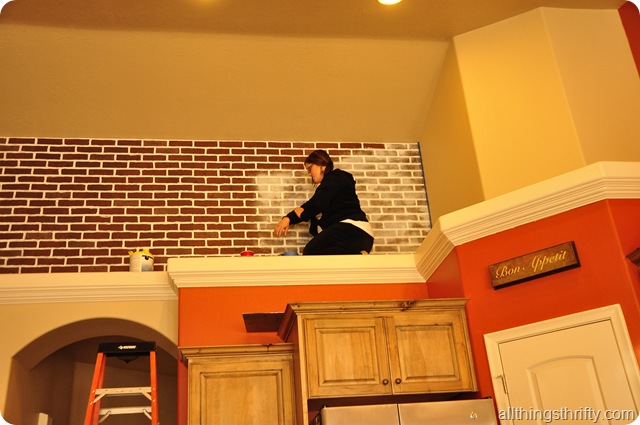 During this process of not being able to see the BIG picture, I made a few minor oopsies. As you can see in the picture below, there were a bunch of spots that literally looked like white SPOTS. Don’t worry I will tell you how to fix those spots in a minute.
 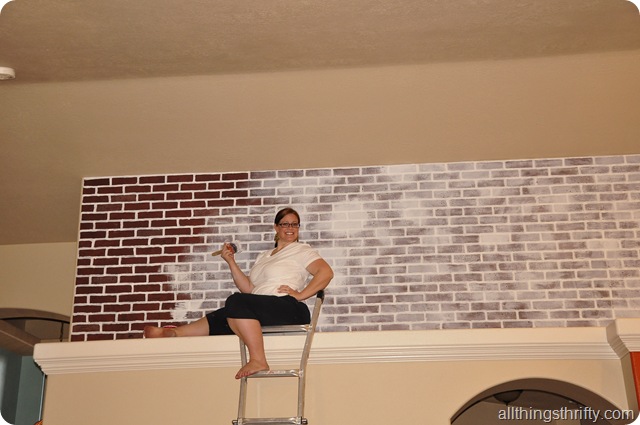 We just kept going and going and going for what felt like………..FOREVER!! I know that someone will notice that my clothing kept changing throughout this process. Yes, that indicates DAYS of painting. Ha ha. It took us a while.
  Like I mentioned above, It turned out pretty good, but during my attempt to make it look OLD and uneven…I accidentally made some spots that looked too much like SPOTS. I took that “uneven” description a little too seriously. Ha ha. So, have no fear if this happens to you. We simply got my electric sander with 220 grit sand paper and started sanding away the spotty spots. It worked like a charm. I painted a little more in a few spots and sanded off the paint in others until the look was “uneven” but not as spotty as before.
It turned out GREAT, and it added just the right amount of texture to the space above my plant shelf!


Here is a little video to show you more of what the process looked like. {My daughter Oaklyn was my camera person, and she did a pretty good job!! Just disregard her little voice saying “I’m recording.”} Ha ha.
I am really excited to show you what we have done next, but you are just going to have to wait and see!! I’ll just say it is OLD {in a good way}. 🙂

This is SO COOL! I have always wanted to do this and I am psyched that you are 'bricking' the way for others to try as you have!
Love the project and the pictures of you up there. And of course the lingerie!
You have such an incredible eye and are extremely talented! Thank you for sharing. I'm pinning all this away for future reference!!! 🙂
Looks great!! I think I have a guess about the next thing, but won't spoil it. That good ol' dry brushing…did that cross-hatch technique to glaze my bedroom & bath one weekend – 10 hours. I think I built up the muscles in my right forearm :). Love your adventurous DIY spirit!
oh MY brooke! what a huge job! but it looks A.W.E.S.O.M.E! great work!
It looks amazing, just as I suspected it would. Great job!
Looks fantastic! Of course you're killing me with your wait and see of what you're doing next. :O) Fabulous!
Thanks so much for sharing, and of course I'll be back.
It is cruel how you string us along!! ha ha Can't wait to see what you do with it next!!! Thanks for sharing!
It looks fantastic… I can't wait to see what you have done next!
It looks wonderful. And boy are you brave.
Traci
Looks great, I can't believe I like it actually. I was worried about your vision for a second until I realized it's YOU and it always turns out great. I would have done the same thing about the "spots". I love sandpaper.
SO loving this, and SO doing this – thanks for the inspiration!
This turned out great! So I know exactly where Holden is because my sister in law and her family (the Deardens) are from Fillmore! We used to visit them all the time when we lived in Utah. How funny!
Love how they turned out!!! Can't wait to try this!!!! Thanks so much for sharing!!!!
I love the way this brick looks. I may have to find a place for some "brick" in my house.
http://lexmallabooks.com/
Love the brick wall!! Great job. I actually own land in Holden. To funny. I didn't know actual people lived there. Just though of it as a place for sage brush and horses. 🙂
This wall looks absolutely amazing! If I didn't live in an apartment I would have to give this a try!
This wall looks absolutely amazing! If I didn't live in an apartment I would have to give this a try!
Looks awesome and it's cool to know someone else that knows where holden is lol
I could comment on what a great job you did on the brick but instead speaking from an old memory I'm just gonna say to your future sister in law…. nothing says welcome to the family like opening skimpy lace in front of old aunts you just met right?
~Bliss~
What a neat idea! For someone duplicating the idea, I wonder….would it be easier to prep each piece (grout lines, distressing with paint) before hanging them, and once they were up, you could just go in and connect grout lines or touch up and distress the connecting areas? Just curious about your thoughts, since you've been there already!
So cool!
This looks so cool!! I did something similar to an ugly wall in my parents basement. Check it out!
http://trickivicki.blogspot.com/2010/10/boy-does-my-hand-hurt.html
and the finished product
http://trickivicki.blogspot.com/2011/01/not-nearly-as-difficult-as-id-imagined.html
Love yours!! It looks so cool in the kitchen!
It should be freezing where you live with all the cool comments, but I must admit That's Cool!!!!
That's for the inspiration.
Looks awesome! Totally up my alley. The last time I checked here, you had just put the brick up and I thought that was it, you were done. So glad that wasn't the case! 😉
I followed your idea, and now my brick fireplace looks so cute!
pictures pictures 🙂
where did you buy the faux brick boards????
We got them at Lowes. 🙂
We just bought a place with faux brick in the kitchen and it isn’t in the budget to start the kitchen renovation project yet (may be a few years down the line!). LOVE what you did and I plan on doing the same! Thank you so much for the idea and step-by-step!!!
I’m definately going to be follow/subscribing your blog. I haven’t even read your whole post :). I was googling brick paneling for Lowes for images so that I can price the panel I previous seen in Lowes but couldn’t find it on the Lowe’s website, saw the image of your hubby pulling the sheet out from the shelf and came here. Long story short my idea for my in home business just went another level because of you. Thank you. 🙂
Always wanted to do this in a spare guest bedroom. What did you use to attach the panels to the wall? Staple gun? Glue? Double sided tape?
We just brad nailed it into the wall with a nail gun! Good luck!
Looks great! Personally, I would have painted the grout lines before it went up, just cause I hate heights!
I love this look! Was looking online for ideas to brighten up my ugly brick fireplace. I’m not all that crafty, but I’m assuming this would work on a brick wall the same as it does on the faux paneling?
Yep! Good luck Gretchen! I’m sure it will look fabulous!
Hey: Love this. Question: In retrospect, would it have been easier to paint the grout and faux finish BEFORE they went up on the wall? THere may be a reason you did it the other way around. So, before I attempt this….:)
Jim,
I contemplated doing it that way for sure, but I wanted to make sure that all the brick lines were perfectly lined up before I painted them and I was afraid that the seams wouldn’t match up perfectly if it wasn’t already hung. But maybe I was worried for nothing. It may have worked great, but I didn’t want to take the chance.
I started this project last night, I am painting before hanging tho cuz its going on a den wall. I used a skinny foam brush and plain old white ceiling paint for the grout lines. I laid it on kinda thick so it looks over grouted, so far so good, now to just dry brush this weekend with something less white. Thanks so much for the inspiration Brooke
love it, been looking for faux brick for my kitchen backsplash,, i am going right out and buying the panels,, hate the black mortar love the white,, thank you very much, tracey
A backsplash is an amazing idea
Ok – I know this isn’t the point of the post, but who is the girl painting the white lines on in glasses and a hoodie??? She is the CLONE – EXACT CLONE of my daughter!
HAHA! That’s me Aimee! I had glasses and dark hair back then! xoxo, Brooke
Love this!! Great job!
Thank you for the inspiration.
I love the way your bricks turned out, but O-M-G! I had a super panic attack looking at you up on that shelf! I could never do what you did….I had a rip roarin’ panic attack up on the Eiffel Tower and couldn’t enjoy the view. I hugged the building at the elevator and couldn’t let go! I’m sure I’d be crying and screaming on your shelf and I’d have to live up there…backwards so I couldn’t see lol.