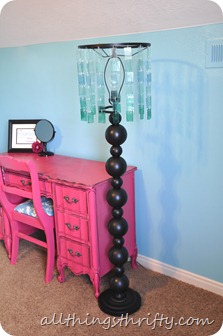
I know, you are thinking CHRISTMAS ORNAMENTS!?!? Are you nuts? Well, I’ll begin with the simple answer, YES, I’m nuts. Ha! But, I’m nuts in a good way. I create things on a dime around here. It’s a fun challenge for me and this is one of those fun projects.
Any idea how much this bad boy cost?!? Well let’s just say that it was super THRIFTY!! When the lamp began it was a mere thrift store lamp for $8.00. It was uber ugly and brass. I had a vision and the hubby wasn’t on board {at first}. That’s kind of the story of my life around here.
I’m the visual person that can “see” what the end result will look like. But, sometimes it takes some convincing for the hubby to hop on the bandwagon.
This particular campaign took a few weeks and began in May of 2011 when I posted the first Christmas Ornament Lamp project. I have to admit hearing the “you were right” speech from him felt good! 🙂
Fast forward a year or so. Dan and I get cast on the show Craft Wars and we get a CRAZY challenge to make a lamp out of LENSES! Well, this is what that vision was supposed end up like! If you haven’t watched the episode, I won’t spoil it. I will have a complete recap soon.
But first, if you would like to make this fun lamp, it is super easy and REALLY unique. It’s a bit time consuming to be honest {just being real}. We started out with the Christmas Lamp tutorial that I already mentioned above. You basically cut holes in Christmas ornaments {the plastic non-shatter kind} and stack them on top of each other down the pole of the lamp. You definitely need someone who knows how to wire a lamp because we had to cut the wire and then re-wire it.
To make the lamp shade, you will need an embroidery hoop, plexi glass, craft wire, food coloring and mod podge. Yes, that is a funny list, but you will need each one to complete this fun project!
Then you need to go to Lowes and buy a sheet of plexi-glass for about $8.00. You will need to score the plexi with a plastic scoring knife and carefully measure out your squares.
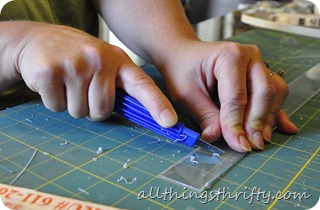
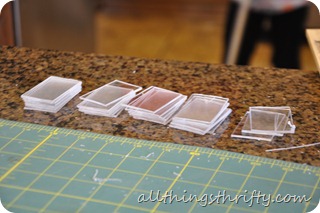
We made our plexi squares two inches long and one and a half inches wide. We wanted each strand to have six pieces of glass and we needed sixteen strands to go all the way around our 45” circumference of the embroidery hoop. So, if you do the math, we needed 96 squares of plexi-glass. {Which is why we didn’t make the lamp out of lenses like the Craft Wars challenge said…it would have cost us a LOT of money to re-create this lamp. No thanks. I’d rather do it the THRIFTY way.}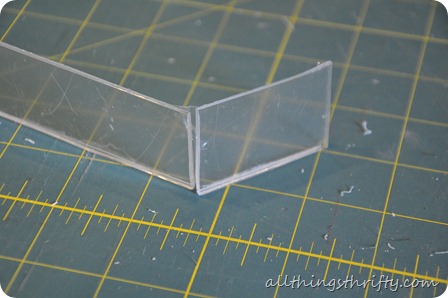
After you have 96 squares cut, you need to drill a small hole in each side of 80 of the squares. The other 16 will only have one hole drilled into them. Those 16 squares will go on the very bottom of your strands.


We came up with an easy way to make sure the holes are in the exact same spot on each plexi square. We drew a square on a 2X4 and used it as a guide for all 96 squares.
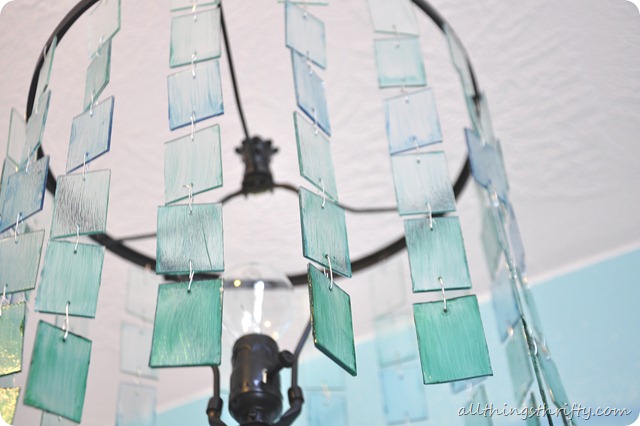
Next, you need to mix your mod podge and food coloring. {On the show we used rit dye and that worked great also}. Our main focus on this project was to make the plexi {and the lenses on the show} look like sea glass. I wanted the glass to be translucent so that the light would shine through the lenses. I didn’t want to just paint the lenses with paint or the light wouldn’t resonate through. That is the GREAT thing about mod podge. When it dries it will be clear.
To dye the mod podge is simple, just add a couple of drops of dye to it and stir until you have the color you are looking for. To get the turquoisy teal color we chose, add some blue food coloring and some green food coloring.


 We wanted an ombre in our lamp shade so our mod podge mixture started out dark for the bottom lenses and gradually went lighter and lighter as the strand went up. Beware: your hands may turn out like mine {dyed for days}. Or you could wear gloves…that would be the smart thing to do.

After you have painted your plexi, then you will need to wire them together with craft wire. We didn’t use jump rings because they wouldn’t fit. 🙂
Then we carefully drilled small holes in the top of the embroidery hoop and attached each strand to the hoop. We took apart an old existing lamp shade to use for the hardware.
The end result is ultra unique and it turned out even better than my original vision. Of course the pictures don’t do this justice.


Some of you might want to see the transformation of this fun pink desk. 🙂
Thanks for visiting! Come again!

Love this and I think this would be fantastic for my guest bath with its sea glass theme. I will have to give this a whirl (when I have time….) Thanks so much for breaking it down. Watching you on Craft Wars right now!
I love this one better than the one you made on Craft Wars!
This lamp looks amazing! I love the ombre! I liked your lamp on Craft Wars best, too! Everytime I watch that show I am disappointed with who goes home in the first round. Bummer. You were JIPPED! 😉
I wAnted you to go to the next round! You did a great job. I really enjoying your blog. Thanks for all the ideas you have and sharing it with us.
Love the look of this, and loved the one on Craft Wars! Great job, and so sorry you didn't make it to the next round! I thought for sure you would move on, you should have!
Debbie 🙂
LOVE how this turned out! You did a great job and were robbed I tell ya 🙂
Beautiful!!!! What a creative, awesome project.
Tanya 🙂
WHAT A GREAT IDEA , IT TURNED OUT SO CUTE!
I thought for sure you were going to move on, that guys lamp was … Interesting. You were robbed 🙂
Brooke! Your lamp was totally my fave! So fun to watch you! Great job!
You are brilliant and this is absolutely stunning! I loved seeing you on TV you did awesome! I was so sad when you didn't move on but you were gracious and well spoken, I was so excited to actually KNOW you! (Dan did a great job too!)
I do not think you should have been first to leave and loved the idea you came up with. But most of all I would have LOVED to see what you guys came up with for the room challenge. Bet it would have been amazing.
The lamp looks awesome, but I must say
"you were robbed! "Your ideas should have been enough to get you through! Loved the finished project
The lamp looks awesome, but I must say
"you were robbed! "Your ideas should have been enough to get you through! Loved the finished project
Gorgeous lamp! I agree with everyone else…I thought you should have gone on to the master craft round, too. Your lamp was gorgeous. It takes longer than an hour to think up and create a masterpiece!! Which your lamp is, of course. ;o)
Very creative 🙂
it must be so crazy to have such a time limit with such crazy stuff! you had a great idea and how fun to be on a show with tori spelling! they suggested making the bottom ombre, you still liked the black :}?
Thank you for all your cute comments! Kelly, I think keeping my lamp black is the look I was going for. If it were painted ombré, it would be too uniform for my taste. 🙂
Very cool! Glad you showed us what what was in your head on Craft Wars. 🙂 You represented well!
I loved your lamp on Craft Wars, and I totally thought you should have made it to the final round. I am so excited to have found your blog and especially this tutorial for this lamp!
I came to your blog after seeing you on Craft Wars Because I fell in love with your lamp and Your style! I would watch your craft show! 🙂 But I guess I will have to settle for your Amazing blog! 😉
You two are an awesome team definitely worth watching and reading – you're an inspiration! I think the lamp turned out gorgeous! Beautiful job!
This idea is so cool. I really thought you should have moved on to the next round in craft wars. How did you get selected to be on there? I really think this is going to be my favorite new blog!!!
The entire room is beautiful and your pops of color I am in love with! I’m married to an electircian and he is really known as McGyver. He is all on board with making me a lamp just like this changing the colors just a bit. Your lamp is amazing and you should be so proud of all you have done. It looks gorgeous. You have a great vision of what you want and it is vey impressive. Just beautiful.