
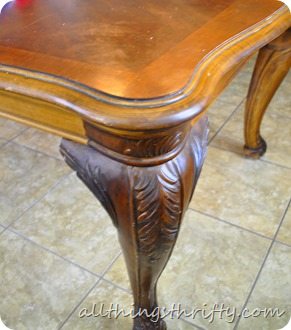
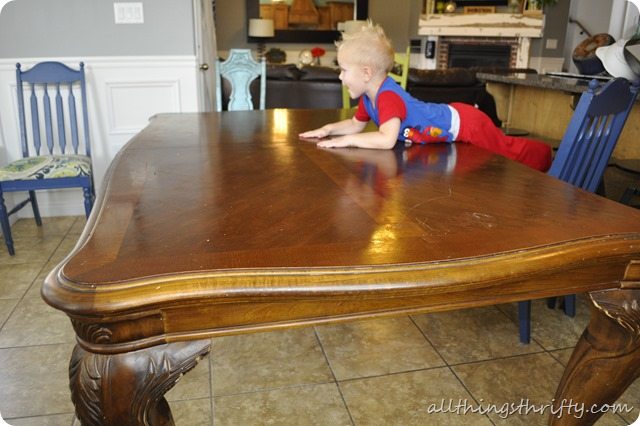
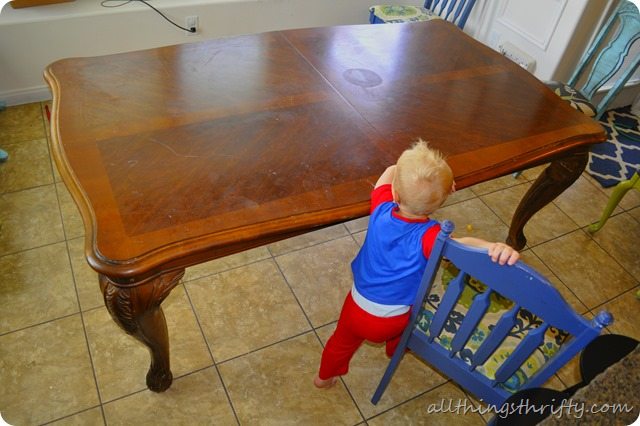
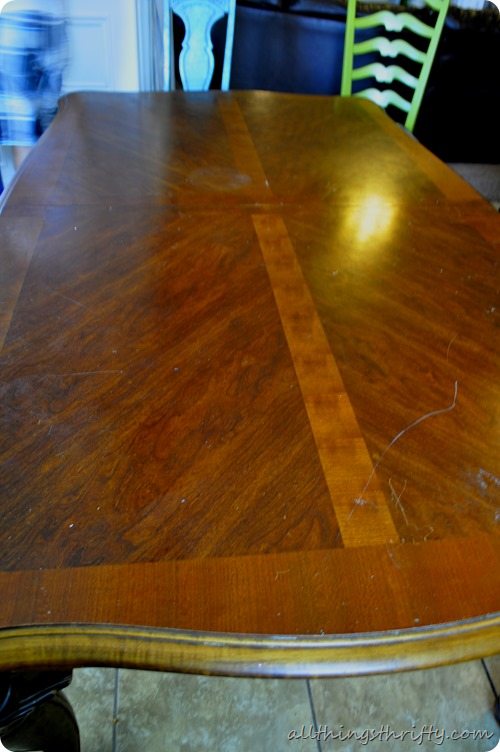
1. Find a table and wash off all the macaroni and cheese splatters. {The lacquer won’t stick if it isn’t clean}. We bought ours at a yard sale for $125.00. It is solid wood and three people can barely move the beast.
2. Design or purchase your vinyl. I made my fork and knife on my Silhouette machine and cut the vinyl myself.
3. Weed the vinyl with a hook tool.
4. Measure your table to make sure your vinyl is placed just right.
5. Use transfer tape to place your vinyl on your table.
6. Use an old credit card to smooth out the vinyl if needed. Make sure that all the edges of the vinyl are flat against the table to prevent bleeding.
7. Lightly sand the table with 3M extra fine sanding pads. These are my ABSOLUTE favorite sanding pads! Don’t forget to wipe off the sanding dust with a lint free cloth after. We even blow off the dust with an air compressor also.
8. Protect your lungs with a 3M Tekk Protection mask, and spray your table with grey colored lacquer. We chose Sherwin Williams Passive 7064 for the grey color. I used the same lacquer products that I used in this previous post about spraying kitchen cabinets. Let the grey coat dry and then lightly sand it with 3M fine sanding pads and wipe off with a lint free cloth . You will be able to feel where it needs to be sanded. If it feels rough, sand it until it feels smooth. We painted the entire table grey because we didn’t want to create ridges. We even did a few coats {sanding in between coats} of grey to make sure it was covered well.
9. Next, use ScotchBlue 3M painter’s tape to stripe the table. {Where you put the tape, it will stay grey}.
10. Make sure the edges of the tape are cut perfectly straight with a razor, and make sure the edges are pressed firmly onto the table. You don’t want the paint to bleed under the edge of the tape.
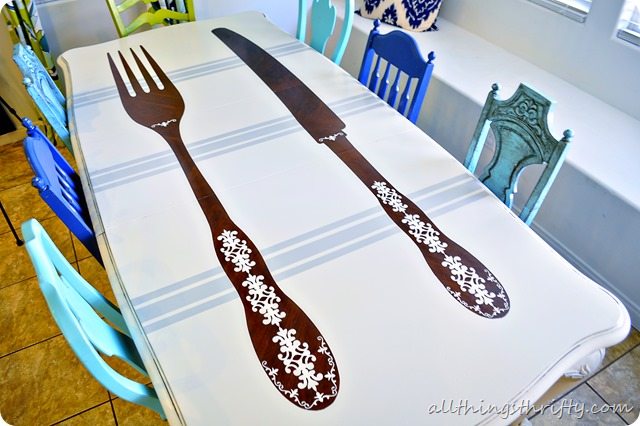
11. Remove the tape from the parts of your table that you don’t want to be grey. We removed it from the design on the inside of our vinyl. {This is just personal preference…look at the picture above for reference.}
12. We used two sizes of ScotchBlue 3M Painter’s tape to create one large stripe and two small ones on each side. We measured precisely so that the stripes would be perfectly straight.
13. After the stripes were taped off, we put our protective gear back on. Believe me, you do NOT want to skip putting masks on. The lacquer is SUPER strong, and the fumes are very thick. You don’t want to be breathing this stuff, I promise.
14. Begin spraying the white lacquer. We chose Sherwin Williams Alabaster 7008 for this portion.
15. There is definitely a learning curve when learning how to use the paint sprayer. We learned that spraying a thicker coat was a better idea than thin coats. The thin coats needed extra sanding and the thicker coats were much softer. {The thick coats did take more drying time though.}
16. We sanded with 3M extra find sanding pads in between each coat and wiped off with a lint free cloth after sanding. We did 3 coats of white lacquer.
17. After the white lacquer dried, we started removing the painter’s tape {which created the grey stripes}. Since the table had a smooth flat finish, we got a perfect paint line without fussing with it at all.
18. Remember that during projects, looking like a beauty queen is a must. {Or a sweaty rat, whatever you think is best.} ![]() Let your lacquer dry completely. It will depend on your climate and working temperature how fast this takes. For us it was over 100 degrees when we sprayed ours. So the drying time wasn’t more than 20 minutes per coat.
Let your lacquer dry completely. It will depend on your climate and working temperature how fast this takes. For us it was over 100 degrees when we sprayed ours. So the drying time wasn’t more than 20 minutes per coat.
19. Begin taking off your vinyl. This part is REALLY fun! As we pulled off the vinyl, the pretty wood portion of the table made all the work worth it! You will need a hook tool for the small vinyl portions…
20…. and the big portions will come off with no fuss. Just be careful not to scratch up your wood because it will show from here on out. After you have all of your vinyl off, you will never guess what you need to do before you put on your clear coat!?!….YEP, sand with 3M extra fine sanding pads and wipe off with a lint free cloth. {This just helps the lacquer to adhere to each other}. I’ve heard that this step is optional, but we were extra diligent and did it anyway.}
21. Next we laid the table on it’s side to spray on the clear coat. We decided this was actually not a good idea because the clear lacquer seems to run easier than the colored base coats. So, after we did that, we ended up sanding off parts that ran with 220 grit sand paper. So, we put it back on the saw horses and painted it as demonstrated in this video.
22. Sand in between coats of clear lacquer and wipe off with a lint free cloth.
23. If you are like us, you will be spraying in your garage with the door open, or spraying outside. Beware, bugs will land on your clear coat and get stuck there for all eternity. Keep a clean razor blade handy to extract any bugs. ![]()
24. Do one last coat of lacquer and don’t touch it for 12-24 hours to allow for curing time!
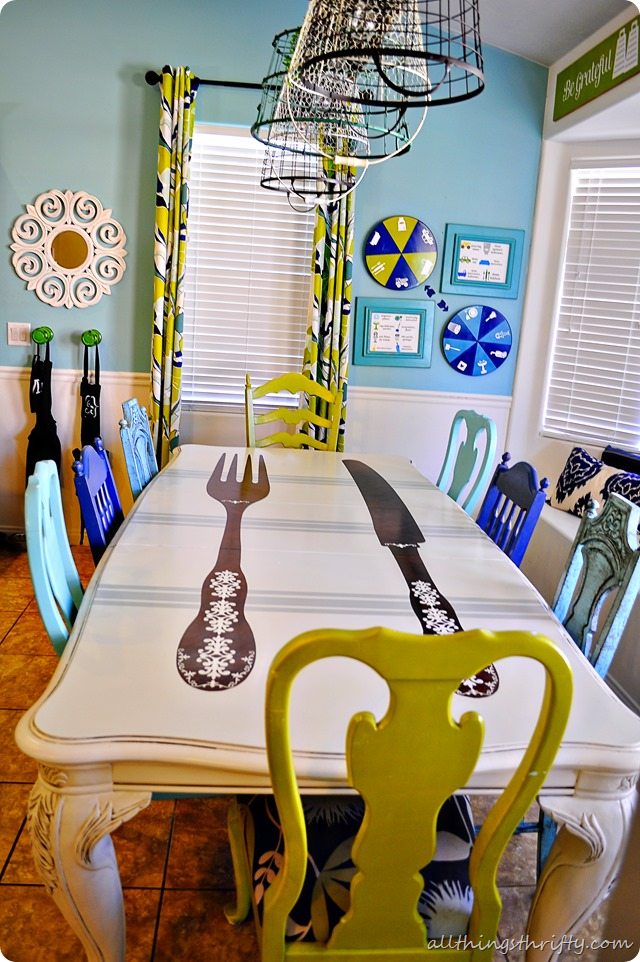
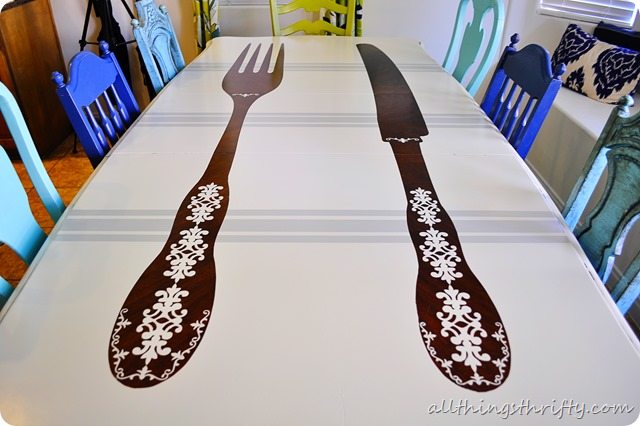
The wood fork and knife are so stinking awesome in real life! Pictures just don’t do this bad boy justice!
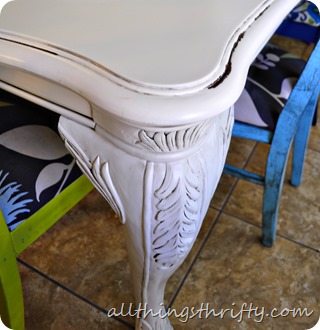
We glazed the legs and distressed the creases a bit to add a little bit more character. In order to distress the creases, I got a small flat screwdriver and scraped off the white lacquer before we sprayed on the clear coat.
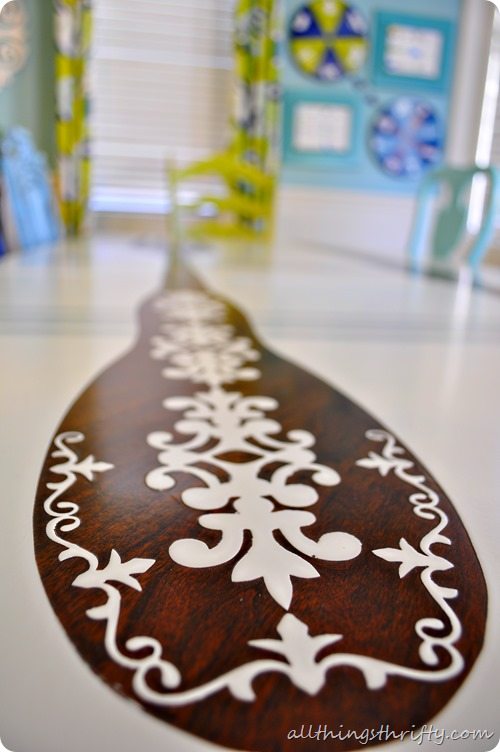
I love, love, love it. It took a lot of work, but we wanted the table to last, and although I LOVE spray painting, I know that painting with lacquer is a much more durable way to paint furniture! Especially furniture that is used multiple times a day like a kitchen table!
This post is a collaboration with 3M DIY. To keep up-to-date on projects, products and sampling visit 3MDIY.com
Check out 3M on their : 3M DIY Twitter Page and their 3M DIY Facebook Page

 mask, and spray your table with grey colored lacquer. We chose Sherwin Williams Passive 7064 for the grey color. I used the same lacquer products that I used in this previous post about
  3M painter’s tape

 Check out 3M on their :
LOL! What a perfect reimagining of the big fork and spoon people used to hang on their walls
This table is amazing! You did such a great job! I love the chairs too.
Thanks Shanna!
Awesome! I’m beginning to love the idea of lacquer. The video you linked to isn’t working, though.
Courtney,
Thanks for the heads up! I fixed the link!
Looks great!!! I love it. What sprayer are you guys using? I like that there is no tank attached to the gun, I use a gravity fed HVLP gun attached to the air compressor.
I also gotta say, I have never heard of lacquer PAINT, I always assumed it was just a stain or a clear coat. I’ll have to take a look at this next time I’m at Home Depot.
Jesse,
I don’t think Home Depot carries it. I bought mine at a specialty paint store called Jones Paint and Glass.
I am using an industrial grade Titan sprayer with a hopper on top. It holds up to a gallon in the hopper at a time. It is a HUGE time saver. It is awesome! Check out the video https://allthingsthrifty.com/2013/07/how-to-paint-lacquer-with-a-paint-sprayer-tips-and-tricks.html and you will see a picture of the sprayer.
oh my gosh, that is so crazy creative and i love it!
Thank you!
Oh man Brooke! This is freakin’ gorgeous! Swoon!
Thanks Katie! xoxo
yep your right never seen one like it before!! It is super cute, love the fork and knife :-)!
I have a thing about painting real wood, but this just blows me away. I have some wood that’s getting painted, baby! Thanks for the inspiration!
Brooke, this is AMAZING! I love it so much, well and your whole house. You live close enough you could come makeover mine, right? 😉
Looks AMAZING girl! You are so creative!!
Sooooo glad to see you wearing that mask. Want you breathing years from now for your grandkids!
You never dissappoint! It’s amazing! Now you have to help me convince Mike that painting my table and chairs IS a fabulous idea. This should help me plead my case. Love your face!
AMAZING!!! That’s All!
That table looks incredible!!! I always get some great inspiration from your projects 🙂
Very, very cool and fun! That table (before) looks a lot like our dining room table — only ours is in better condition. My hubby would die straight away if I thought about doing a treatment like this on it. lol! Men are so funny about “good wood!” Our eleven grandchildren would love it thought and I would no longer worry about getting it “messed up!”
That is the coolest funky-est table and dining room I have seen in … well forever. I love it. Great job. Lots of hard work but it sure paid off.
Wow! This is my first time visiting your site. I’m super impressed with this project. Very creative!
Would you be willing to cut more vinyl and sell it? How much would it be? This is beautiful!
Yes! Let me price it out and get back to you!!
Me too!! Me too!! Please send me pricing for the utensils, I have an old table that needs some work and this is perfect
Thanks for the inspiration
Stunning!! It’s so pretty!! You did an amazing job!! I love that you chose the fork and knife with the design on the handle. It’s stunning!!
it really is beautiful!
Mind sharing the color you used on your chairs! They look awesome too!
Brooke this is amazing!! SO FUN. I love the chairs too. Wanna come do one for me? 🙂 xoxo
Brooke I am in love with this whole room. I am a color girl and adore the pallet, the chairs and the table is beyond AMAZING! Love it, best thing I’ve seen in a while!
that is a great table. Sadly, 3M tests their products on animals
Wow. Someone shared this on facebook. What a great solution to a common problem. Compliments to the writer as well. This was a fun read. It would be interesting to see a list of equipment, and costs for each (and where someone might rent a spray gun.) Great job here. Peace.
Super Cute!
I just fell in love!!! Your table is absolutely beautiful and wonderfully unique. I’m going to have to buy a Silhouette just for the knife and fork cut out! I’ve been looking everywhere for anything remotely like the curtains you made for Jill and I’ve been so disappointed. Sadly, I can’t do this on my table since it was just delivered last week, I don’t think my husband would approve of this design on something brand new. Thank you so much for sharing your design flair. I just wish I had enough talent to try to copy it! If you ever want to sell a pair of those curtains, please let me know!
This looks absolutely fabulous! Love it =)
You have inspired me. I have been wanting to paint an accent on my kitchen table and this is perfect. I would love to buy your vinyl as well. Let me know if this works for you. Great idea and design.
Love this! I need some of your furniture painting expertise: I inherited a dresser that was poorly redone. There’s a cost of white paint on it that is peeling because the original finish on the wood wasn’t sanded down before painting. I want to repaint it but am wondering if I need to completely remove the previous paint job (basically get it to bare wood) or do I just to rough up the existing surface enough for the new paint (same color) to properly adhere? Does that make sense? I’d really appreciate your input!
Brooke…You never cease to amaze me. This totally “rocks my socks off!” You used to sell the fork and knife images, but I can’t find them anymore:( I would love to do this on my table. Please let me know if you would be willing to sell the image.
This is one of the most creative pieces we have seen in a long time! Truly remarkable idea! Thank you for the inspiration & creativity! Amazing blog;-)
Ananasa.com- Home For Handmade
Brooke,
This is sooooo beautiful…I’m learning a lot from you..I’m also interested in the images if you decide ur ok with selling them..please let me know..
Hugs
Susana
So my question is if I wanted to paint my kitchen table an actual color and I really like the bahaus gold. So if I primed it and painted it, then it with the clear laquer, would this last?
You content the lacquer whatever color you want so have it tinted Bahauas Gold. It will last a ton better if you do it this way. I promise.
I have a silhouette but, I am new to it… how did you cut such a long piece of vinyl? This is stunning btw.. I don’t have room for a table that big but, I can try to adapt to what I have. I need to get my hands on a sprayer…lol
any way you would share where you found the design?
I just replied to you on Facebook! I hope you got it!
I happily found this looking blog looking for something else.
I have a table that looks almost exactly like yours and I was thinking of painting it, but rejected that idea (thought it too complicated) until I saw your blog. The table’s legs are a bit different, they are more towards the center. I am in a Brooklyn, NY apartment, which is not too small, but I think too small for turning the table over and painting. That’s where I am stumped. I have a feeling I am need to get some help from someone that paints furniture……..Anyway enough babble…..Thanks so much for a really creative post….gives me new ideas for something old.
Where can I get these stencils ?? This is just adorable!!!! LOVE, LOVE, LOVE this!!!!!
Email us at allthingsthriftyassistant at gmail dot com and we can help you!