Do you ever psych yourself out about a project? You may know the type of project I’m talking about. The one that is always on your mind, but you just don’t seem to make it a priority.
Well, our master bedroom just might fall into that category. I’ve had it on my mental “to do” list for over ten months. I guess that’s what I get for having a mental “to do” list a mile long. I’ve posted about the progress and the plan, but then I put it on the back-burner. What the heck!?! I posted about the plan in September of 2013!!! I should be embarrassed, but it’s just life. So I can’t be, or I would need to apologize every day!
Here’s a little look at the bedroom from where we left off:
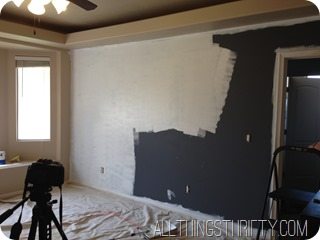
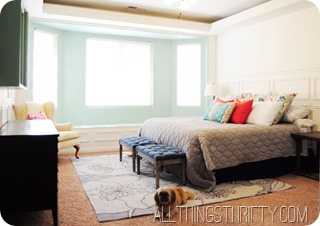
Hold onto your hats folks, but the bedroom is DONE!! I’ll be posting the full reveal this week, but let me teach you how to make this freakin’ bomb dot com headboard first. It truly is fantastic in person, so hopefully the pictures do it justice!
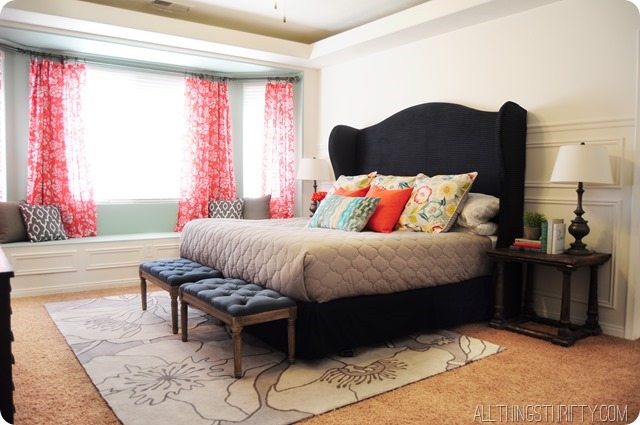
The headboard took us less than 24 hours! I promise, it’s definitely doable in one weekend. Gathering the supplies is the hardest part in my opinion!
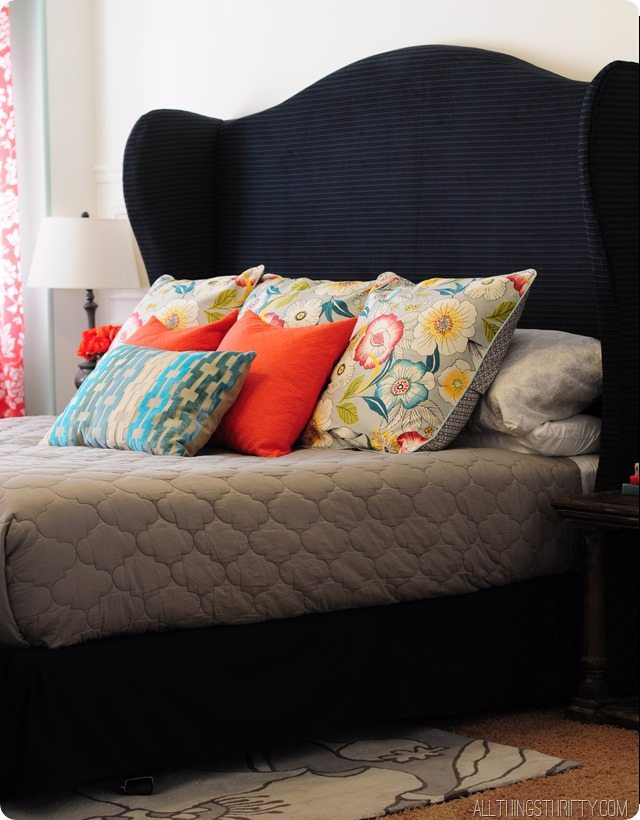
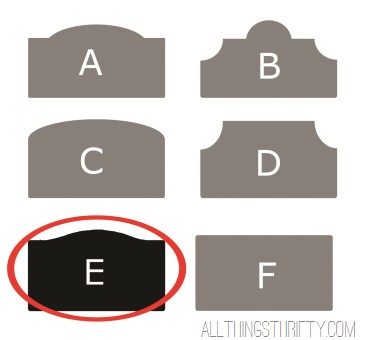
I posted the debate about the headboard shape, and we chose “E” for our project, and when I searched online for a pattern for that headboard shape, I couldn’t find one. So, I made a pattern as a free download in case someone wants to make their own version. What can I say, I’m cool like that. I accept payment in cookies.
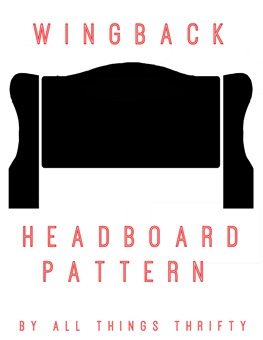
Before I get into the tutorial part of this post, let me warn you that this post is looooong, but pictures demonstrate the process so much better than words at times, so forgive me.
Step 1: Take this amazingly free download and project it onto a 78” X 48” sheet of plywood… {these measurements are for a KING size bed}. Quick tip: When you buy the plywood, just ask the nice associates to cut it for you at the store. That way you are ready to roll when you get home.
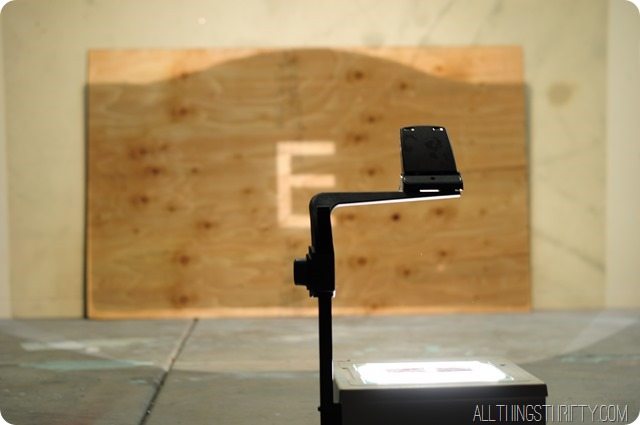
Trace the pattern with a pencil. 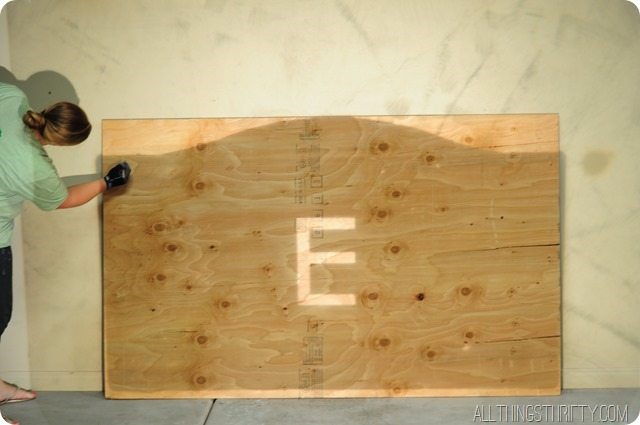
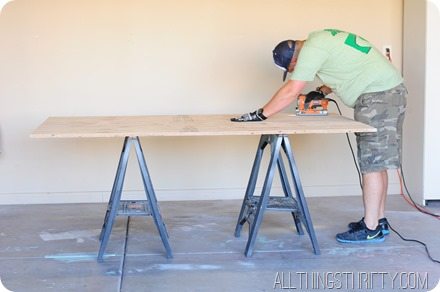
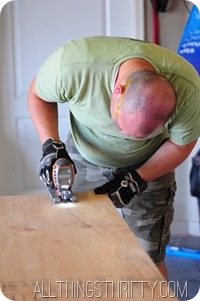
Step 2: Cut it out with a jigsaw. Listen peeps, I promise you do not need a handy dandy man for this. I just happened to live with one of those {I know I’m lucky, you can hate me if you need to}, but I could do this myself and have many many times. So don’t stress. It’s easy peasy.
Don’t forget to trace the two wings to your wingback headboard too. These two sheets of plywood need to be 16 inches wide and 66.5 inches tall. We wanted our wings to go all the way down to the floor, so that’s why our wings are taller than the middle piece.
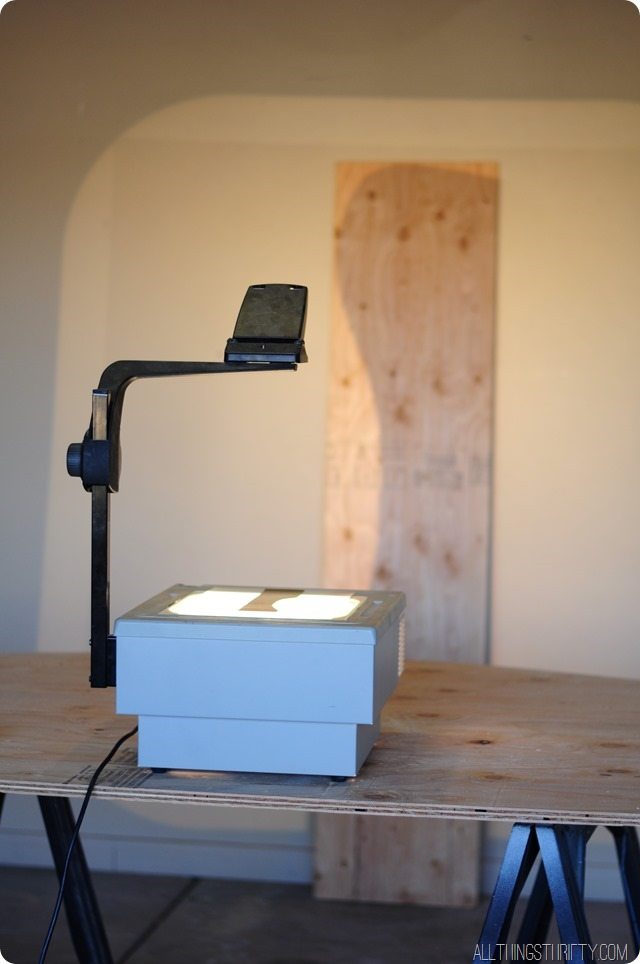
We actually only traced one with the pattern and then laid one on top of the other and traced it that way. It was faster than using the projector. 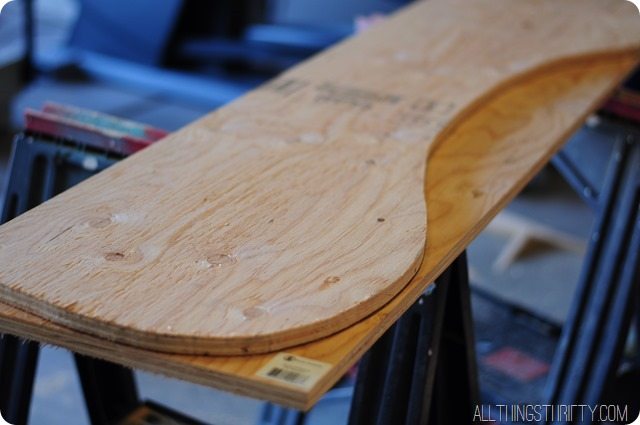
Step 3: Sand the edges of your plywood with 220 grit sandpaper. It goes much faster with an electric sander. 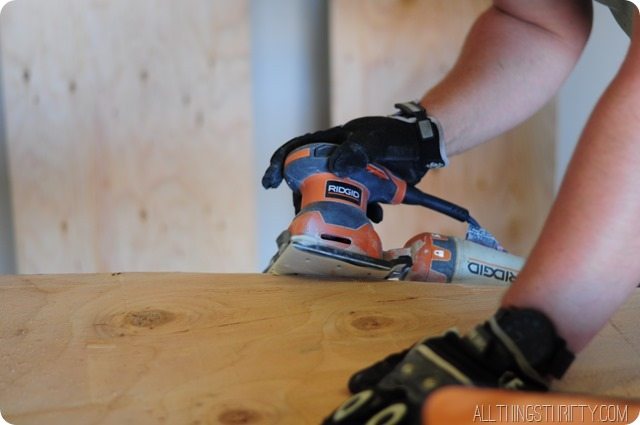
Step 4: Glue together three outdoor foam pieces. {I bought mine at The Home Depot for around $17 each}. I used spray adhesive to glue them together, but you can also hot glue them. I’ve done that in the past.
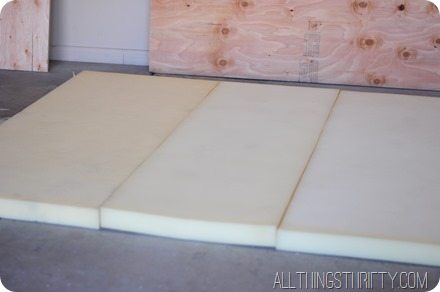
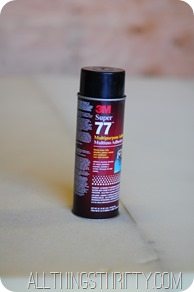
Step 5: Glue the foam to the board by using spray adhesive. I sprayed the board and then placed it on top of the foam.
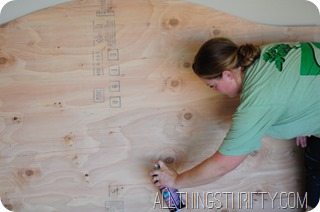
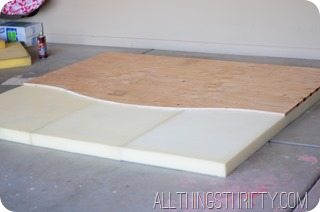
Step 6: Cut the foam to the exact size of the board. Quick tip: If you use an electric carving knife it cuts like butter.
Step 7: Glue two more foam pieces to the wings. {We used five foam pieces total}.
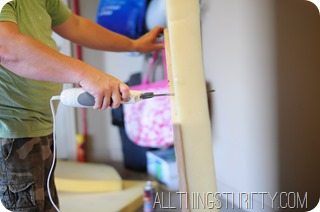
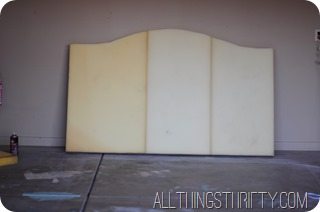
Step 8: Upholster those bad boys. Use this tutorial for step by step instructions on upholstery.
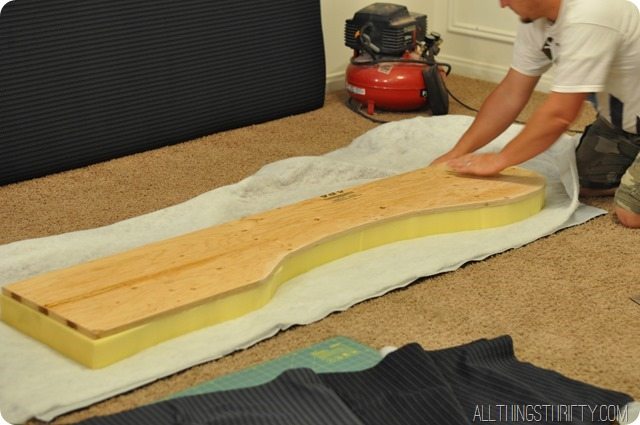
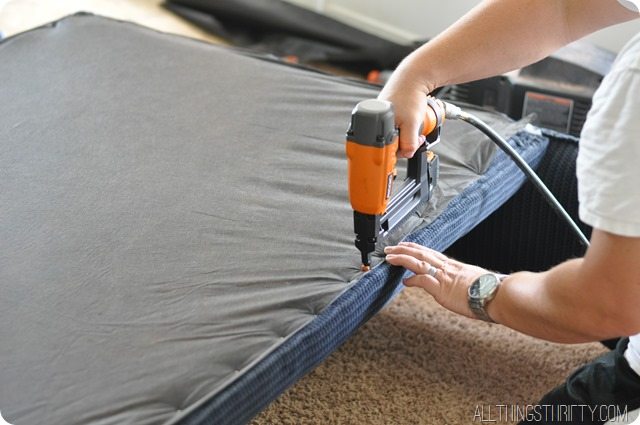
We first tacked the cotton batting on with our pneumatic staple gun, and then trimmed it with scissors. Side note: A good pair of scissors would work soooo much better than the ones that my kids have used to open popsicles for the last three months.
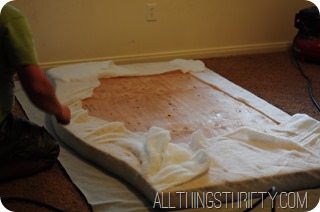
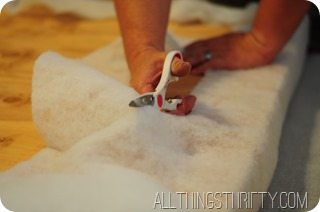
Then the we pulled the fabric tight and stapled it.
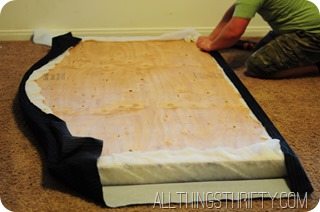
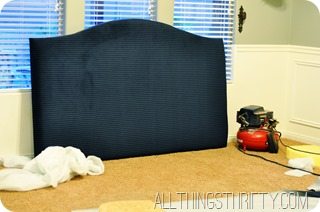
In order to have fabric long enough for the wings, I sewed a piece to the bottom of the fabric. After I had fabric long enough, we upholstered the wings too.
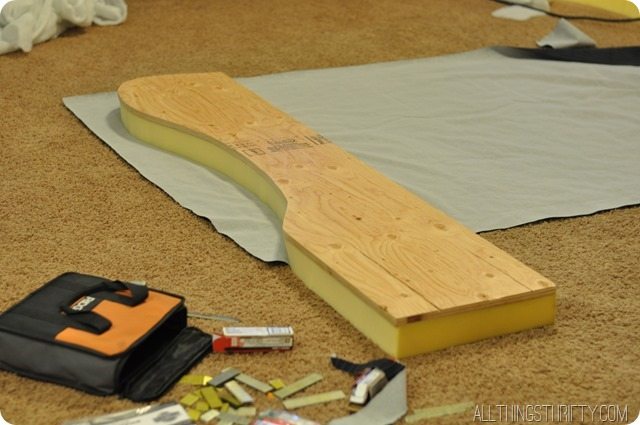
Step 9: After the three pieces are upholstered on the foam side, turn the wings over and staple piping along the outside edge. I bought the piping at the local fabric store.
The outside panels of the wings are the trickiest part, so I’ll try and illustrate what I’m talking about with a few images. 
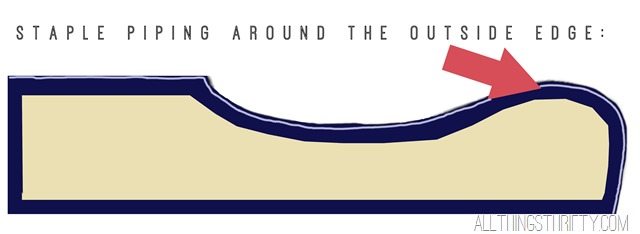
Note: You only need piping on the top and front of your wings, not the back or bottom.
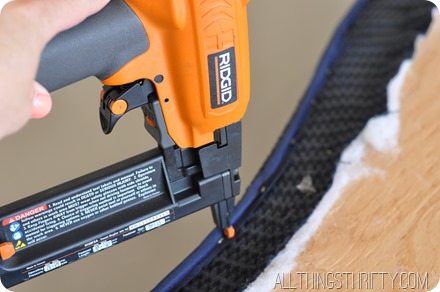
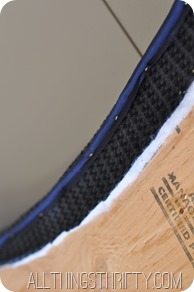
Step 10: Staple curve ease / ply grip to the inside edge of the piping. You can get this at a local upholstery shop, or I bought mine on Ebay. 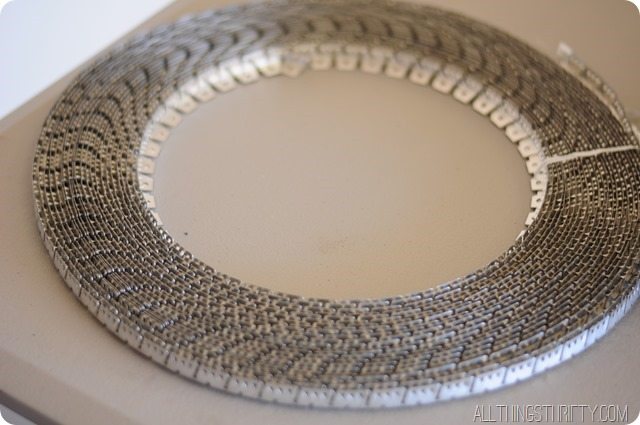
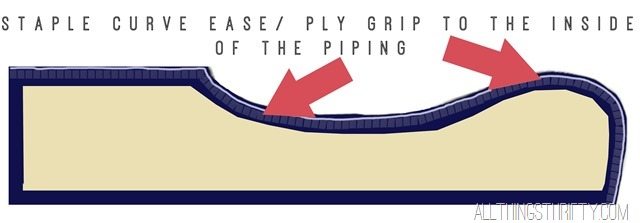
I used a heavy duty staple gun for this. 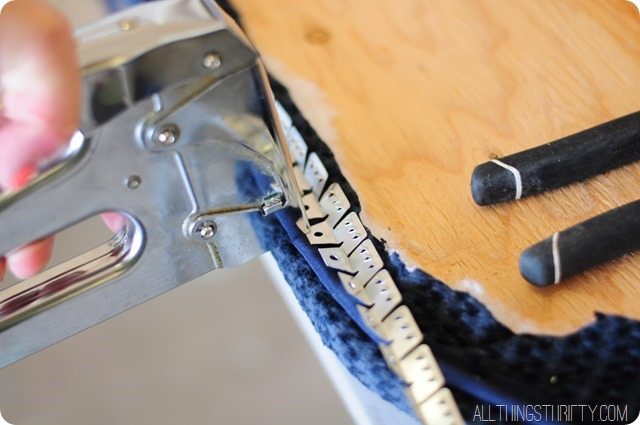
I learned that having each hole stapled is a much better idea than skipping some because then the ply grip stays exactly where you want it to. 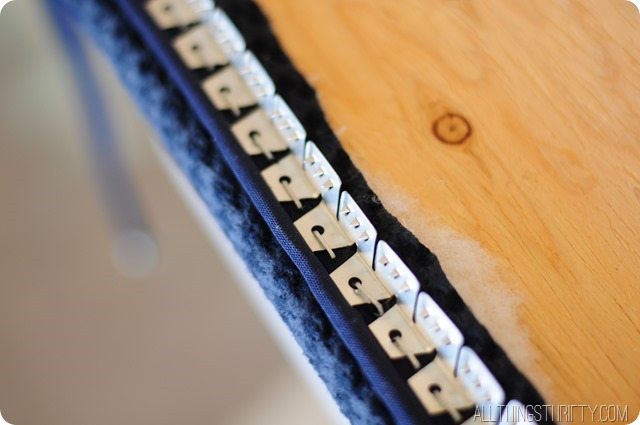
Step 11: take your thumb and push the hardware down about half way.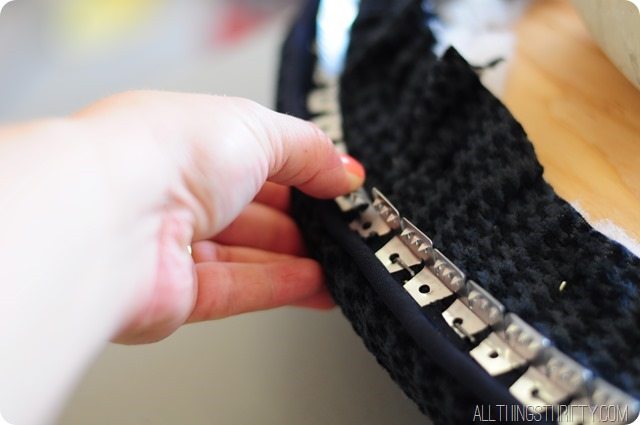
Step 12: Cut a piece of cotton batting and fabric to fit the side of your wings. I laid the batting right on top and trimmed it with scissors. Then I placed the fabric on top and trimmed it right along the outside of the piping.
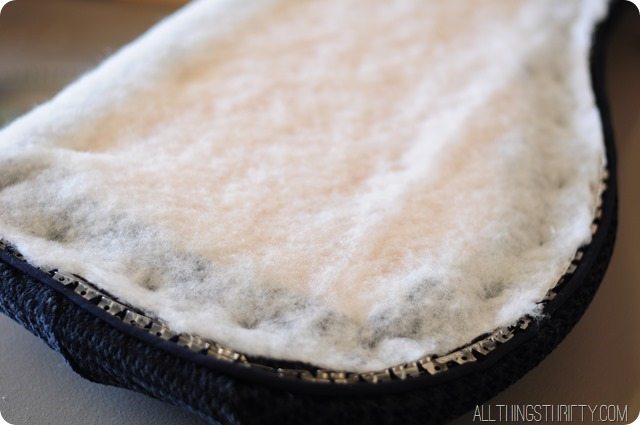
Step 13: Use a flat-head screw driver and push the fabric into the jaws of the ply grip…. 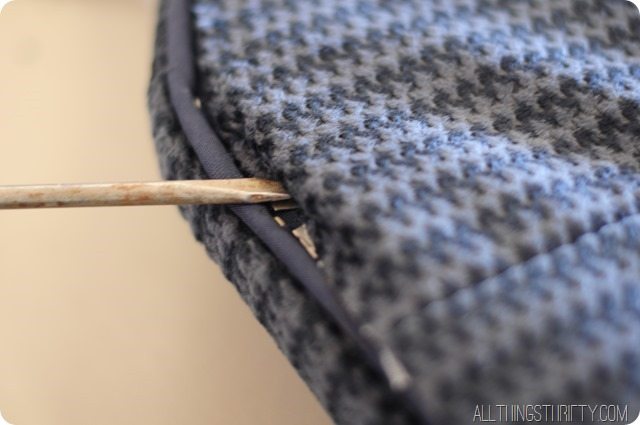
then push it down with your thumb. 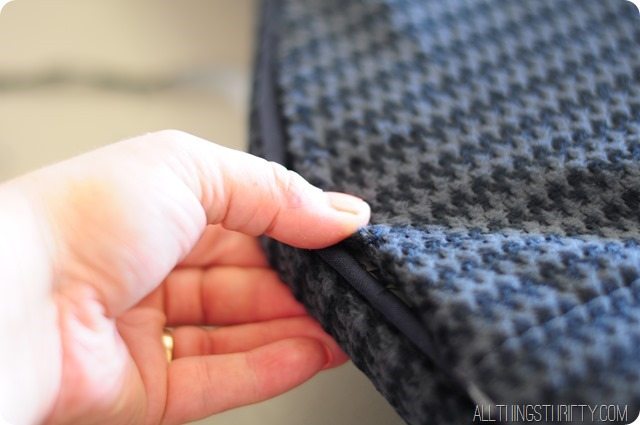
Step 14: After your fabric is pushed into the ply grip, use a rubber mallet to tighten it down. 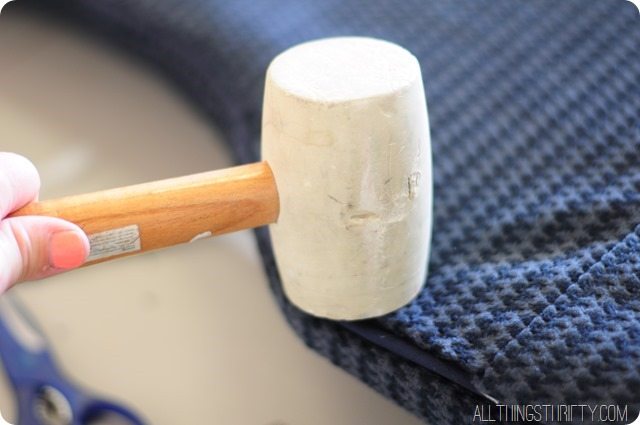
Do not staple the back and bottom fabric to your wing yet.
Step 15: Screw the wings to the middle piece with large L metal brackets.
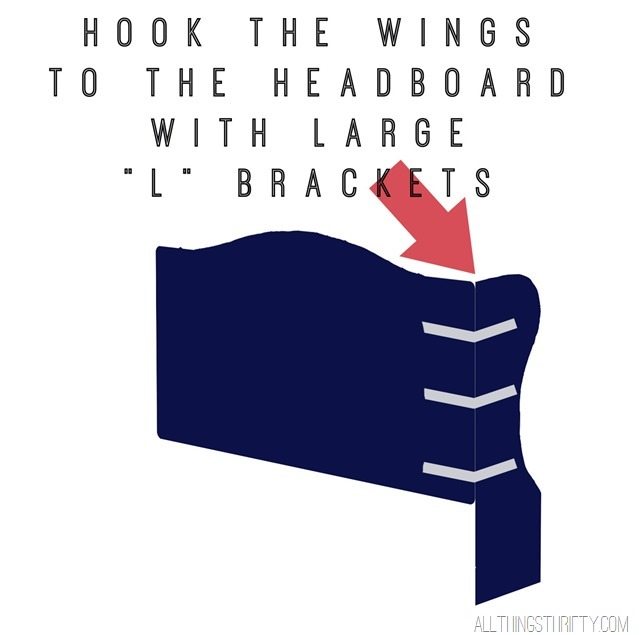
Make sure you place the brackets underneath the fabric so they are hidden.
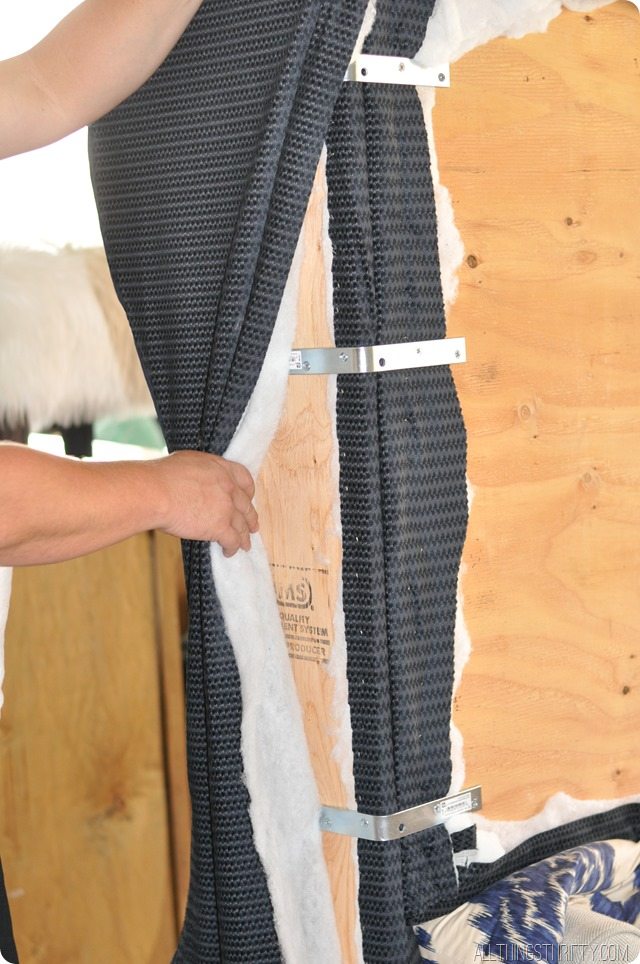
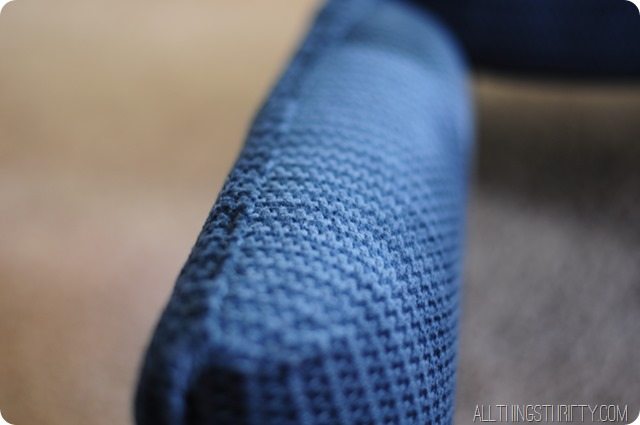
Step 16: Staple the side fabric around the back and pull the fabric and staple it along the bottom also. You will have some extra fabric that needs to be stapled. We just rolled it and stapled it to the back since it won’t show.
 .
.
We stapled black weed mat to the back to cover up the ugly staple mess. We are legit like that.
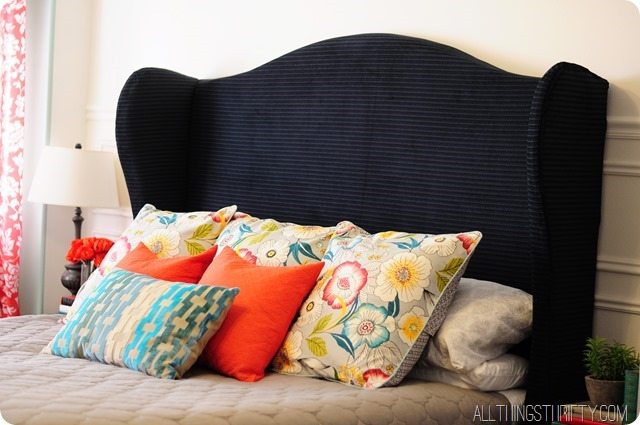
I am dying over how massive this bad boy is! But, it’s PERFECT! It’s the perfect masculine touch to our master bedroom! I hope you like it!
xoxo,
Brooke

Brooke- It’s gorgeous! So glad somebody finished their master bedroom because ours has been “in progress” since January! Love this and love YOU! 🙂
This is just AWESOME!!!! where did you get the fabric from if you dont mind sharing, thanks
Hi Sara!
I got the fabric in Las Vegas at Home Fabric and Rugs, my fave fabric store of all time! It was only $6.99 a yard too!
So Pretty! Congratulations on finishing your master bedroom–I can’t wait to see what you did. Mine is still on my mental “to do” list. 🙂
Love it!
LOVE IT!! I had seen a wingback headboard about a year ago that I tried to talk Pila into building….it was a no go. but you make it look doable with the step by step instructions. Thanks!! (I had to laugh at the scissors being opened by popsicles comment…I think every single one of us can relate to that!!!)
This is awesome! Any tips on how you lined up the staple to the hole in the ply grip? That looks insanely difficult! Also, did you get any special kind of staples? Thanks again – I can’t wait to do this at home 🙂
On the front of the stapler there is actually a little guide line. It took a few trial and error practices to get it right, but it became super easy as I went on. And, no, I don’t have any upholstery staples or staple gun, so we just used regular 1/2 inch heavy duty staples!
Perfect, thanks!!
Yowza! Fantastic re-do! And the tutorial is awesome. Definitely pinning this page. Thanks!
Oh my goodness! It is STUNNING! I love the navy fabric you chose! Off to pin!
This is absolutely gorgeous! Now I’m mentally planning a master bedroom redo, too! 🙂
Brooke – you ABSOLUTELY INSPIRE me!!!!!!!! It turn out so gorgeous!!! I have been meaning to do a project just like this & I totally chickened out & ended up just buying a headboard on a screamin’ sale. I could so use you living closer to push me to tackle the things I put off for months & even years. I have to ask – how do you get your hubs to be such a willing participant? 🙂 Mine is like “are you sure you want to do this? well….okay- have fun”. I might tackle the more challenging stuff if I could get him on board.
This is amazing! In the first picture it looks like you built an upholstered base as well. Did you? If yes will you be sharing?
Hi Jenna!
No, we just have a navy blue bed skirt so it’s creating that visual line. 🙂
The room is beautiful. Love how it turned out.
Wow! Talk about a statement piece.
Did you anchor it to the wall? To the bed? Both?
Hi Cindy, actually we just set it there! The mattress holds it in place perfectly. We planned to anchor it like we have inthe past with other headboard projects, but it is completely stable without.
Beautiful! How much fabric does this project take? Did you also create fabric covered rails?
I would buy 7 yards to be conservative. We used about six and it was barely enough. It was also 59 inches wide, so if your fabric isn’t that wide, you will need more.
And no, we didn’t create fabric covered rails, we just have a navy blue bed skirt! Xoxo, Brooke
}
It looks awesome!! What should the measurements be for a queen? ????
GORGEOUS! We are moving soon and we don’t have a headboard for our king bed so I’m pinning this for a project for down the road! Also, I love your bedding colors and the pillows. Where did you get them? Thanks!
Not just a stunning result, but an excellent tutorial! Thank you. I subscribing as a result. (Thanks to censational highlighting your be.)
LOVE this headboard!!! I noticed you said you plan to anchor it eventually. How would you anchor? To bed frame or wall?
What a wonderful tutorial and an even better result!!
I’ve just emailed a link to my handy hubby.
Hope ours turns out half as good as yours.
🙂
Donna form Australia
Beautiful! I am getting ready to redo the bedroom, and we have inherited a rather dark and massive bed – I was a bit nervous about how to keep things balanced, but now I have the perfect inspiration 🙂
Where did you get those curtains??? LOVE them!
They are actually shower curtains from HomeGoods! They were on clearance for $12.00.
Wow that was odd. I just wrote an really long comment but after I clicked submit my comment didn’t appear.
Grrrr… well I’m not writing all that over again. Anyway, just wanted to say wonderful blog!
I absolutely adore this! I’ve been putting off making a headboard until I found the perfect one – this is it!
Hello brooke,
love the headboard, where did you find the foam and where did you find it, if you don’t mind me asking. ? I am adding this to my project list.
We got the foam from The Home Depot. It’s called outdoor foam, and it’s around $20 for a piece if I remember right! Good Luck! You will love it!
Where did you get the bedspread?
I got it at HomeGoods. 🙂 Love that store with all my heart!
About how much would you say this cost you for all the materials you used? Ya know, foam, wood, fabric…
Hi Brooke love the bed!!! Can you provide details for the side boards on bed.
Hi Falisa,
Our bed is on a bed frame, and we don’t have any rails. It may look like it does but it’s an optical allusion. We have a navy blue bed skirt and that is creating that look. I love that you thought they were side boards because that is what I wanted it to look like!
That is exactly what I’ve been looking for! It looks great! Is the bed a hollywood frame or a platform?
It’s a Hollywood frame. 🙂 We have a bedskirt that gives the illusion of a platform. 🙂
Brooke I am trying to download your DIY free download pattern. It will not let me download. Please Help!!!!
Can you right click and save as? Will it allow you to do that?
Hi Brooke! Awesome job! I’m dying to do this project with my own bedroom. I’m a little confused on how to use the pattern you provided. How would I get it to the size I need to be traceable?
You can adjust it in photoshop. 🙂
I love your detailed pictures. I want to make this for my daughters room. I will tuft mine. Your explanation of putting on the fabric to the ply grip is so much easier than the way I was showed to do it . Thank you for the patterns. Your head board looks amazing. Wish I didn’t have a headboard I didn’t like in my bedroom.
Brooke, you’re a rockstar! We just ordered our first king bed and we’re going to make my dream wingback headboard, thanks to YOU! Thank you so very much for this awesome pictorial. xo
This is EXACTLY what I have been looking for! I’m hoping to tackle this over the holiday break!
Thank you!
Good luck! You will love it!
Thanks for posting this. I really wanted something like the Pottery Barn Raleigh wingback (the bed Kate Winslet swan dives onto in The Holiday) but I couldn’t imagine spending over a thousand dollars on a headboard. My husband said no! I really like this tutorial and I’ve started working on it. I wanted a slightly softer curved shape so I made my own template in Adobe Illustrator. I’d like to send the PDF version of my file to you to add. You know, to contribute to your effort. Please contact me.
I can see using a couch & sides to do this. Just need to build a base box to set it on. Thrift store trip!
Could you give the exact dimensions for the 3 pieces of plywood? I’m looking to have someone else cut them for me and they couldn’t figure it out with the posted template. Thanks in advance!!
The exact dimensions: 1 piece 78”X48″ and 2 pieces that are 16”X66.5”. You will need to make sure that your middle plywood piece template is exactly 66.5” on the outsides when you cut it. That way the wings will match up perfectly
Woahhh! Look so beautiful. It is hard to believe you can make it by yourself.
Is the projector yours or did you borrow or rent it? Looks amazing!
It’s ours. We bought it years ago from the DI. {our local thrift store!}
Do you remember what thickness of plywood you used? Thanks!
3/4 inch plywood
How thick is the foam? I’m thinking about doing this but with latex foam instead. You did a great job!!
Our foam was 3 inches wide