The good thing about Restoration Hardware is that it is definitely eye candy. I love looking at their catalogs, their home decor style, and their rugged/industrial type accessories are breathtaking. The bad thing is that everything in the entire store is very pricey. I love it though. I wish I had unlimited funds! Wouldn’t THAT be nice!?!? I’ve been eyeing the amazing birdcage chandeliers for awhile now.
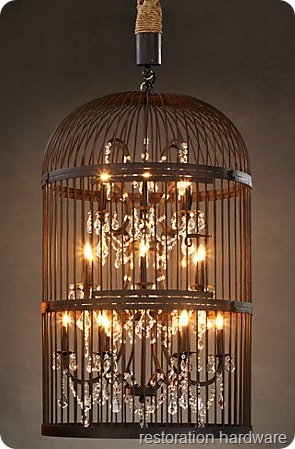

So, instead of paying $2300 for this Restoration Hardware birdcage chandelier, we MADE OUR OWN!! This is one of my favorite projects that we have ever done here on All Things Thrifty!!
Once upon a time there was this prince who journeyed to other lands {let’s call him Prince Dan}. While visiting these other lands, the Prince would sometimes find treasures along his way. Prince Dan found a birdcage abandoned and ready to be thrown in the dump. Prince Dan knew that his Princess was OBSESSED with old things so he decided to bring it home in case she ever wanted to do anything with it…and they lived happily ever after. The end. Ha ha. Just kidding. Of course the story isn’t over! The story is just beginning! BAHAHA.
This is the birdcage that my super amazing Hubby brought home from a business trip for me…yep, you read that correctly…FOR FREEEEEEEEE!!! I knew exactly what I wanted to do with this bad boy, and Dan decided to tackle the project without my begging/nagging for his help. In fact, I was doing a completely different project {that day} and he made the entire chandelier without me! ? What a hunk ?.
Step 1: Find a large birdcage.
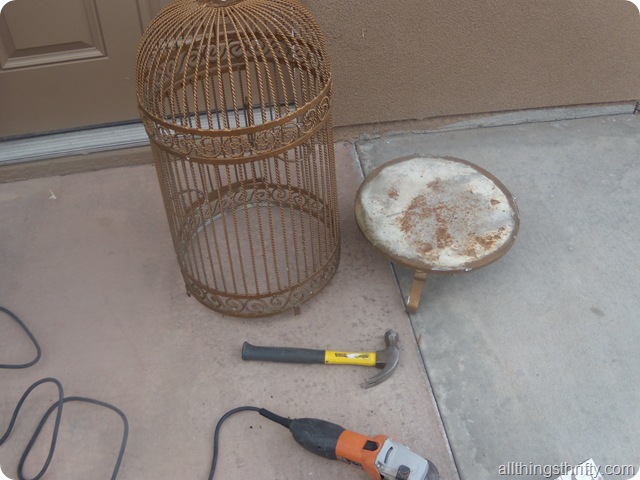
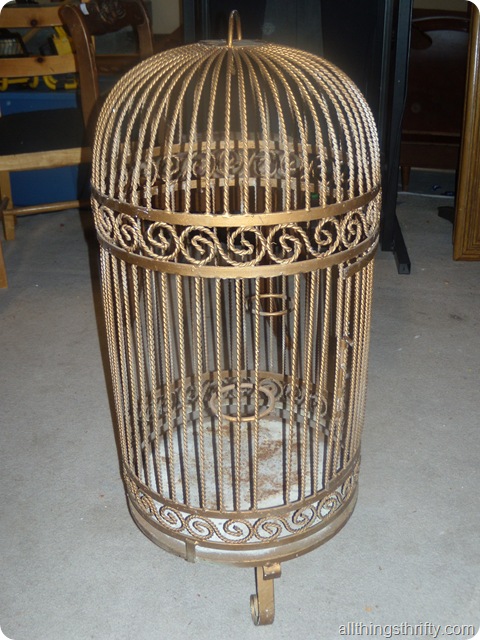 Step 2: Use a grinder to remove the bottom portion of the birdcage.
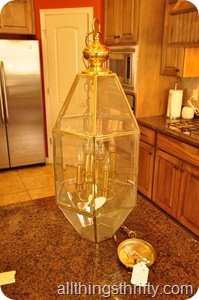
 Step 3: Find a small enough chandelier to fit inside the birdcage. We bought our chandelier at the local Habitat for Humanity Restore for around $25.00. Step 4: Disassemble the chandelier, but make sure you save all the electrical wires and parts to reuse and put it inside the birdcage. Drill a hole in the top of the birdcage for the electrical wires to fit through.

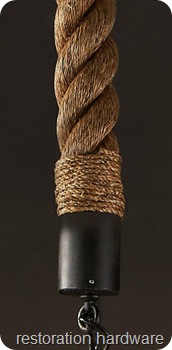

 Step 6: Add teardrop jewels. We drilled small holes in the chandelier to add jewels. You can buy chandelier jewels in the lighting section at your local hardware stores. We bought ours at Lowes. We simply drilled small holes and stuck the jewel wire through the holes to attach them.
  Step 7: {take off the jewels temporarily} then Paint your chandelier. Make sure you tape off your rope before you start painting. We used Rustoleum Metallic Oil Rubbed Bronze paint and primer in one for this project.
 To make painting easier, we hung the chandelier in our garage.
 I was super careful to paint every angle inside and out of the birdcage. I also painted the spray paint lids on the top and bottom of the rope.


Step 8: Hang the chandelier. Make sure you have someone that is experienced in electrical wiring. {I’m lucky that Dan knows how to do all that}.
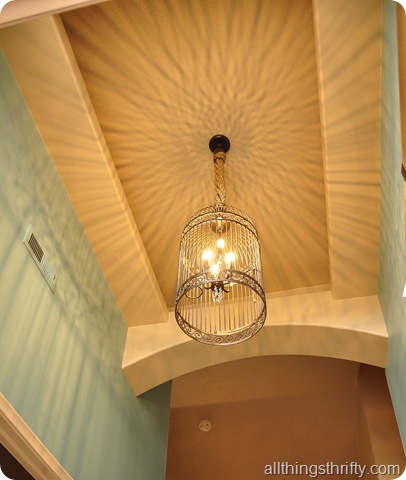
The birdcage chandelier is the first thing that you see when you walk in my door, and EVERYONE loves it! I particularly love the design from the chandelier’s shadow.


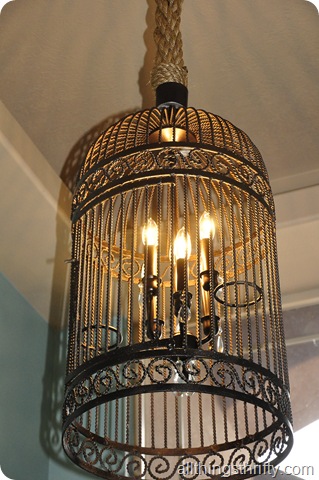
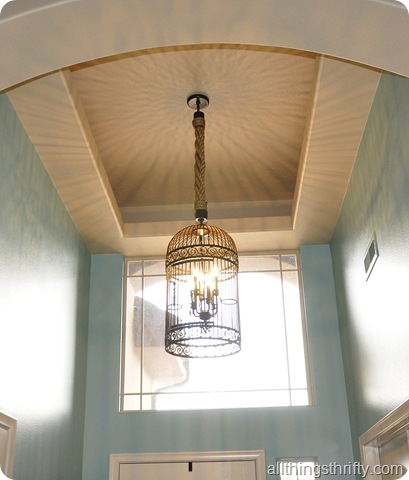
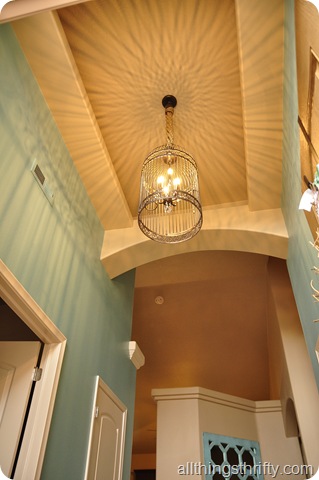

So now we have the look of the Restoration Hardware Birdcage Chandelier, but instead of paying $2300.00, it only cost right around $60 to recreate the whole thing. Now that’s what I call THRIFTY!!!

That is amazing, what a great find and so clever!
I love the chandelier! The shadows it cast are beautiful! 🙂 Awesome job and I love y'alls thriftiness! 🙂
My aunt has been talking about making these for months! She fell in love with the same picture you did I'm sure. Yours looks great and I'll be sure to show her this post!! :]
that really is a wonderful transformation. And it look fabulous. Great job.
Thanks for sharing,
Traci
Brilliant idea – add it looks gorgeous!!
Wow this looks amazing! What a great hubby to find all that for you & help with the construction & installation! Lucky girl! 🙂
LOVE, LOVE, LOVE it, great job!!
That is a great idea with fabulous results. I agree with you about the shadow it casts- how lovely!
Amazing!!!!
That looks amazing!!
Beautiful! What a great vision you had for your light!
Awesome. Makes me wish I had a foyer!
I am so making one of these!!! I love all things birds and have a dozen or so of birdcages so this is a gotta do project!!!! Thanks so much for the great idea! I pinned this to show off too!
bee blessed
mary
Amazing, spectacular, fantastic! Love it.
This is amazing! I need to go out and find my own Prince Dan to help me achieve my diy dreams!
This is so cute! Thanks for the inspiration! You have great attention to detail also!
I love this! This is one of my favorite projects, It turned out amazing,
Wow! That's all I can say. Truly interesting and unique! I never would have though to use the spray paint lids as the end caps for the rope…brilliant!
THAT is SO COOL! What a great project and you guys executed it perfectly!!
That is AMAZING. So pretty and low cost. Love it!
That is some Awesome Sauce right there, great job!
This is amazing, and one my favorite projects you've done too! Off to find a old birdcage…
This is amazing! I am in love with it! Maybe one day (when I own a home and all), I can do something like this.
I am sitting here in utter amazement!! This is beautiful! I am so impressed with your hubby for bringing this home and for helping you turn it in to a wonderful light fixture.
This is gorgeous and right up my alley. I love making lamps and this one is spot on. If I have questions I usually have to call my dad…but its great you have such a handy guy to do things like this. Awesome!
wow, this is amazing! I love your blog..so creative and I love your DIY projects!! Thank you for sharing.
Bravo!
ohhh wow! double wow!
your chandelier knockoff is fabulous!
Please link this up to CCC on Thursday!
LOVE it!
gail
Beautiful! Very clever of you. Love the way the light casts on the wall. Great post.
This is so beautiful, and one of the unique qualities that makes a house a home. Thanks for all the (cheap!) clever ideas!
aaamazing! i love it!
You are my hero! I have had this project clanking around in my brain for awhile now…so happy to see it can be done! Great job!
Holy Cow! (Do people still say that??) It looks amazing! Seriously, gorgeous! You and your hubby are super talented.
Totally pin-worthy! Absolutely gorgeous and I love it even more than the $2300 one. I'm not sure I could pull this off but I've pinned it (that's the first step 😉
That looks awesome Brooke!
p.s. I loved reading about your love/hate relationship with Justin 🙂 and he was honored to make the blog! Keep up the good work!
I love it! It's gorgeous! You're blog is so inspiring. Thank you!
I love this! I have the perfect place in my house for something like this.
Best project, ever. Gorgeous.
What a beauty! I seriously thought that first image looking up towards the birdcage was also from Restoration Hardware…but it was your project! It looks amazing 🙂
That is really incredible. Gorgeous!
that is the coolest chandelier!! i love it!!! 🙂 🙂
http://munchtalk.blogspot.com
OHMYGOSH THAT'S AMAZING!!!!!! I LOVE IT LOVE IT LOVE IT!!!!!!!! And oh the shadows!!! Must. make. this.
Ok… this is such an amazing project! I love it because it looks so pretty and I love it because it looked dangerous to install,too! Bonnie and I would be thrilled for you to share this at our link party.
http://www.uncommondesignsonline.com
CONGRATULATIONS! YOU did a great job and I think it looks like the $2300 one — good for you!
What a great job recreating the birdcage chandelier for a fraction of the price. It looks amazing!
Just beautiful I can only imagine walking in your home and looking up and seeing such a beautiful piece!!!
That is seriously brilliant! Love the patterns it makes on the ceiling!
amazing simply amazing great job
That's awesome! And you're right, the shadow is amazing.
I love it!! That is an amazing idea, I would love to try that even on a smaller scale!
O M G! LOVE it!!!
I stumbled upon this page and am glad I did! I love everything about this project!
I found your blog from Knockoff Decor – your chandelier turned out better than RH, I think. Beautiful job. I love the light on the ceiling too.
How skillfull you are! What a great piece! Thank you for sharing!
Brilliant! I loved the RH one when I saw it, but with the hefty price tag and large size it wasn't coming to my house. This is a fantastic alternative!
You and Dan did a wonderfully creative job of recreatig this! I am so tickled to have found your blog!!!!
Wow your chandelier is fabulous! My hubby and I just did a DIY chandelier for our new house that was kinda inspired by one I saw online too. You can check it out here
http://cndesigns.wordpress.com/2012/02/06/a-pretty-cool-knock-off-chandelier/
Gotta love getting the look you want at thrifty prices 😉 Whoo hoo!
Wonderful job! I love reading stories about people that take their creativity that extra mile!
Again, WONDERFUL JOB!
Wow! I found this photo on pinterest. What a great job. I need to try and find a birdcage to try and make one of these. Great tutorial. I am a new follower of your blog.
I'm so glad some body tackled this, I just knew it could be recreated when I first saw them in the magazine! It looks so insanely much like the original, I bet people can't tell a difference. Awesome, awesome, awesome 🙂
So. Freaking. Jealous. Love…love…love!
Well I did it….found a fabulous bird cage today and am going to do the same thing…just turn it upside down….thanks again so much for this creative and fablous idea you two…:o)
Saw the chandelier at RH and fell in love with it, but not the price tag. Hubby sent me this link and Im so impressed with how much it looks like the RH fixture. Great job and thanks for sharing! We will be doing our own light fixtures now. 🙂
Fabulous! Love your wall colour and ceiling lines too! 🙂
Amazing job! I also love the shadows the cage creates on your ceiling . By the way love the color of your entrance as well
You made yours sound so easy! We just finished ours off your inspiration. It took us 2 1/2 days of labor, but we love it! Thanks for the inspiration!
Absolutely gorgeous.
Vidya @ Whats Ur Home Story
http://www.whatsurhomestory.com
This is awesome!!! I love what you guys did — and you are so lucky to have found a beautiful bird cage for free! They are quite pricey in thrift stores 🙂
Awesome idea and looks fabulous!! thanks for sharing~~ I gotta do one now!!
How did you get the rope inside the lid of the spray paint? Did you have to put a hole in the lid??
Hana,
BINGO!
OMg, I’m obsessed with your birdcage chandy! I’m kicking myself now – saw one not too long ago for a decent price but passed it up.
Thanks so much for sharing! It is amazing!
Beautiful!
Your ceiling/wall colors seem to look different from pic to pic…must be the lighting. But, what is that ceiling color? Can you tell? I am remodeling our master bedroom and need to consider something other than white for the ceiling, The fireplace will be a very dark, almost black, granite tile, floor will be honey oak. But I am stumped on the walls and ceiling colors right now.
It’s very rare I come across a DIY project that does not look DIY. Your chandelier looks phenomenal, and store bought! How creative using the spray paint lids! Blown away! 🙂
wow, BEAUTIFUL! You all did a great job! Might be a silly question, but how did you get the rope to stay twisted and not unravel when you let go?
Hi Lori! GREAT question! We wrapped the rope around the chain all the way to the top, and then we wired it together at the top and the bottom. That way the ropes were secured in their final spots and could not unravel. Hopefully this answers your question!
AMAZING! I’m planning on taking on the same type of project. You guys did an Awsome Job!!!!
I love your story and it sounds like u have a keeper!! .?
Your instructions r for beginners ( that’s me)to create really is one of a kind creations ..wow thank u…. Oh and it is not 2,300 dollars ..
Thank u for sharing your creativity but most all your easy to follow and understand instructions..