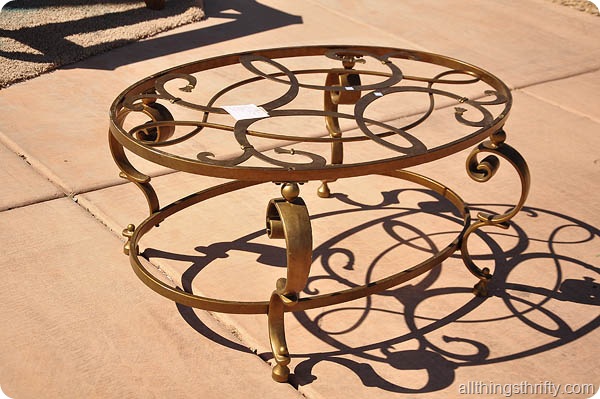
Finding the perfect pot rack for Jill’s house was a challenge because I didn’t want to spend $250.00. I was pretty surprised that pot racks cost that much. Wow. So, I decided that I was going to make it, and when I found a saweeeeeet coffee table at the local thrift story for only $15.00, I was pretty pumped.
The coffee table was super heavy, and when I bought it, I wanted to hang the entire thing upside down as the pot rack. Well, after deliberating with the boss of installation (my hubby), we quickly realized that it was much too heavy to install safely. Our plans always have to adjust and adapt during our DIY projects. I have a knack for coming up with ideas, and my husband has a knack for helping me with the nitty gritty details of it all. I’m lucky to have him. (Sidenote: what are you getting your hubby for Christmas? I’m struggling this year). I might have Adult ADD….Ok, back to what I should be talking about. Ha ha.
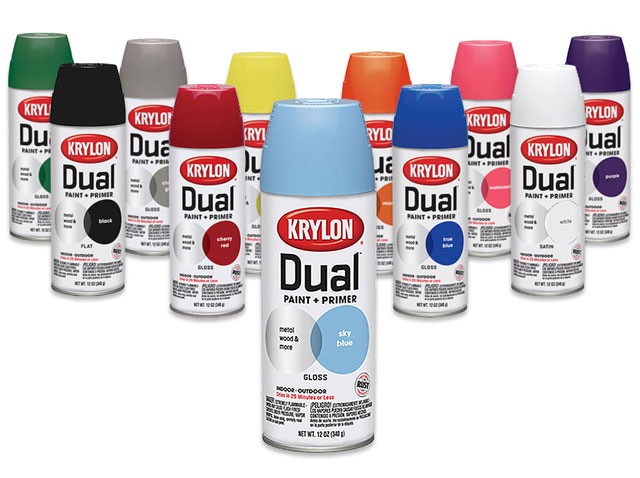
Step 1: Buy a coffee table at the thrift store, at a yard sale, or at a flea market. Just make sure that it is sturdy and is strong enough to hold the pots safely. Like I mentioned above, mine cost $15.00. Booo-ya.  Step 2: Paint the bad boy. I used Krylon Dual for this project. I love this product. It works great on metal, and it doesn’t need a primer since it is a paint and primer in one. Just make sure the wait until the paint is completely dry before you repeat your coats.
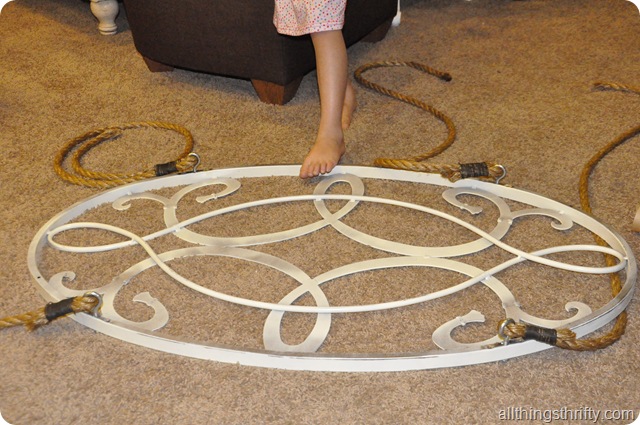
Step 3: Distress the edges of your painted pot rack. I took some 220 grit sand paper and took my electric sander and went to town on the bad boy. I distressed the rack for two reasons: #1: I wanted to create an older look to the pot rack, and #2: I didn’t want to worry if our pots and hardware chipped off the paint in the future. If you distress the rack, the paint won’t need to be perfect in the long run. You are bound to scratch and scrape the paint as you remove pots over time.
This picture below isn’t that great since you are seeing the side of the rack that is intended to face the ceiling. Don’t be critical of my paint job. It looks much better on the side that faces down (which is the side that is visible now that the rack is hung).  You can see the hardware in the picture above though. The next step is to buy the hardware to hang your rack. Remember that you are going to have to adapt to whatever kind of coffee table you bought originally. Depending on the weight and design of your coffee table and design of your space, you are going to have to make some choices as to how you want your rack to hang. I chose thick rope to hang my rack because I have been to Pottery Barn a lot lately, and they ALWAYS use rope to hang their ceiling elements in their show rooms. I LOVE IT. I think it adds an industrial touch to the pot rack. We even used thick bailing wire to secure the rope through the eye hooks. We bought the rope at Lowe’s for about 25 cents a foot.
Hang your pot rack (with the help of a professional who knows what he/she is doing. The rack MUST be able to withstand a lot of weight. Here is Dan and Matt (Jill’s husband) installing the hardware in the ceiling to hold our rack. They were finding studs to make sure that the rack was safe and secure. After the Studs successfully found the studs in the ceiling and measured to center the pot rack over the island, they installed large eye hooks into the ceiling.


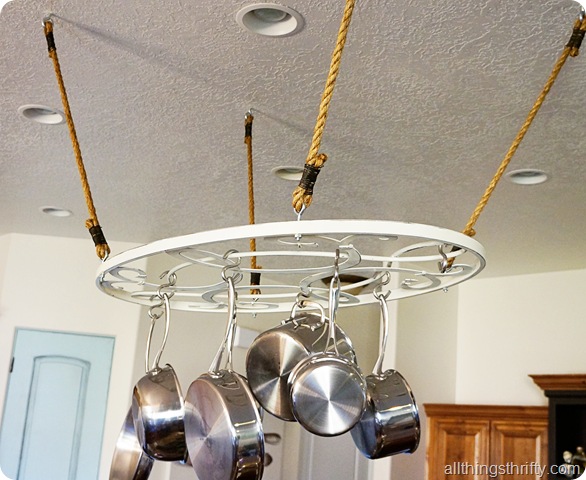
Then they ran the rope back through the ceiling hardware and secured it with more bailing wire.

 We hung the pots with S hooks that we bought at Lowes. I’m thrilled with the result. I LOVE IT. I love that it only cost me $15.00 plus the cost of the hardware and hanging materials! Yay for an inexpensive pot rack idea! Plus, I like this pot rack better than the $300.00 ones that we almost bought.
 Don’t forget to tell me what you are getting your hubby for Christmas. I need ideas. 🙂 xoxo, Brooke

Yea! This turned out looking sooo nice! You did a wonderful job on it. Pot racks are expensive & I love seeing alternative ideas for them.
Something I never would have thought to DIY, but great job for going for it! I think I would have tried to have white rope instead so it all blended but that's just me 🙂
~Kate
Hi Brooke!
Love the pot rack! What a great idea and execution. Now I'm going to be hunting down coffee tables lol!
As for presents for the hubby – I've been really stumped as well. But I did think of one thing and found what I needed at a goodwill. A large clear glass mug, glass etch his name, or just Dad if it's from the kids. Then put a can of root beer, a long spoon and a picture of his favorite ice cream in the mug. Root Beer Float present. My mug cost me $1.21. I had etching cream, and now I just have to get the fillers. Voila! Hope this helps.
Maybe, if you have a chance you can stop by my blog and give me some advice? I'm new at this and looking for opinions. Thanks so much!
Lynn
http://www.scrapityanne.com
http://www.scrapityanne.etsy.com
I would have used chain instead of rope think it would blend better with the metal of the rack and pots. Love the upcycling of the table, amazing what a little creativity can do.
I've been thinking about a pot rack and I love this idea! Now I just need to find a great coffee table…
For my husband who loves to cook, I bought a gelpro mat. he complains aout his feet hurting after cooking dinner
My 2-year old told me he wants to give his dad $13. Maybe that's all your husband needs too?
I love the look of the rope and the pot rack! Good Job!
And my hubby is getting a camp chef with a BBQ grill to go on it and some CDs. We have to share our gift this year 🙂
Wow. This is brilliant idea! I will definately try this one.
msbwstripes.blogspot.conm
This is a wonderful idea, I would have never thought to do it. It turned out great!