Hi y’all! I am just head over heels excited to be sharing on All Things Thrifty! I have long admired Brooke and her blog, and I am thrilled to be here.
My name is Rachel and I blog over at Like a Saturday. I’m a Texas girl married to my college sweetheart and our baby is our mini-schnauzer, Macy. My husband and I bought our house in the middle of our 5 1/2 month engagement {because we are insane}. We have been working hard ever since to transform our blank slate house into a home! I love a good DIY or craft project, and I’m super pumped to be sharing an easy one with you today!
As much as I love plants, I struggle to keep them alive for too long. I’ve been on a trek to find the hardest plants to kill. Succulents definitely fall into that category, and they’re just plain adorable, so I incorporate them often in my decor and gardening.
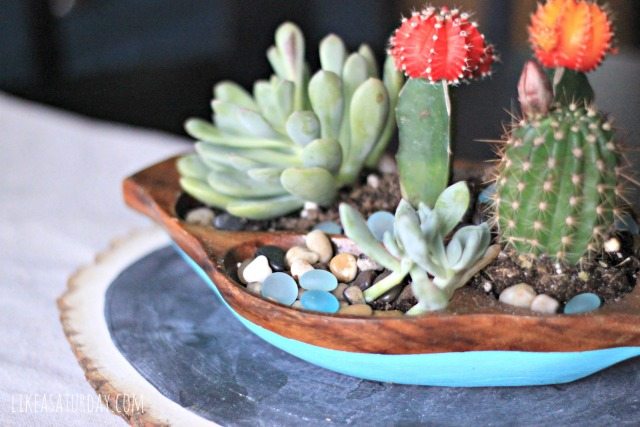
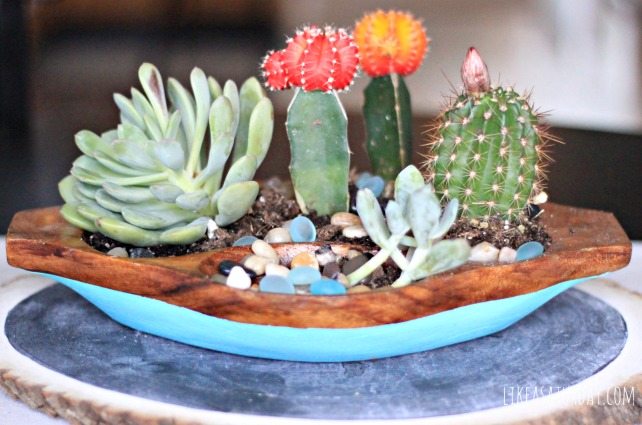
I’m also a fan of the “paint dipped” look, so I thought it would be fun to incorporate that with my love for succulents and create a cute planter for the summer. To create a similar look, you will need:
- a wooden or bamboo bowl {I love to pick up wooden bowls from thrift stores, but you could also use a salad bowl or a wooden pillar candle holder}
- painter’s tape
- craft paint or spray paint in the color of your choice
- foam brush {unless you’re using spray paint}
- sandpaper
- gravel
- the cutest succulents/cacti you can find
- embellishments {marbles, river rock, miniatures, etc.}
To begin, you will need to tape off a straight line where you want the paint to end on the bowl. You’ll notice that I ended up using masking tape, because the painter’s tape I had on hand was too thick for the look I was trying to achieve. Make sure the tape is secured well and is flat to avoid any bleed through.
Next, you will need to lightly sand the portion of the bowl that you plan on painting. This doesn’t have to be a major sanding job. You just need to scuff it up enough for the paint to adhere well.
After you have taped and sanded the bowl. you are ready to paint! I chose to use a craft paint and foam brush. Paint away from the tape to avoid bleeding. It took me 3 coats of paint to get full coverage {the photo above is after the first coat}.
Once the paint is dry you can carefully peel off the tape. Take a good look at your handiwork and take care of any needed touch ups. You can spray the outside of the bowl with a clear coat if you’d like to help your paint last longer.
Now it’s time to get your hands dirty and start planting! 🙂
You will need to lay a thin layer of gravel. Succulents do not need very much water at all, so important drainage is crucial. Otherwise, you may be dealing with rotting roots. Depending on the depth of your bowl. you may not need any additional soil aside from what the succulents were originally potted with.
Now you get to enjoy arranging your cuties in your new planter! Have fun with this! There are no wrong answers. They are like miniature, living sculptures. Succulents and cacti are so much fun to work with!
The last and final {and most optional} step is to add embellishments to your arrangement. I added a handful of sea glass-like marbles as well as some extra gravel here and there. This adds both texture and a little extra pop of color to my arrangement. I have also had fun adding quirky miniatures to my planters, like tiny red and white mushrooms or mini yard gnomes. 🙂 I think the sea glass look is perfect for summer, and it looks great with the blue paint!
I hope you’ll pop on over to visit me at Like a Saturday and say hello! I’d love to meet you. 🙂
You may also like:


This is such a cute idea! It could also be a cute housewarming gift or house-to-house holiday gift!
I love the housewarming gift idea!
That’s a great idea, Lorrie! 🙂
This is adorable! Lovely idea. Have a great week!
This turned out awesome Rachel! And I have a nice stockpile of thrifted wooden bowls that I have been waiting to do a project with…! 🙂