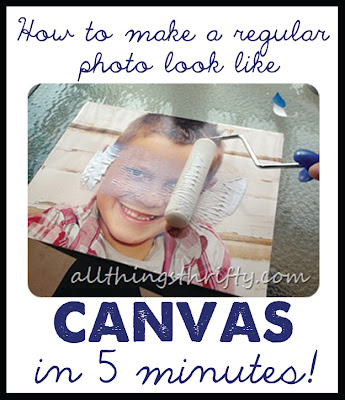
The hardest part of the entire project is finding the texture cream! The product that I use is from Gluefast and it’s the 520 semi-gloss quart product.


Next, take a foam roller and spread the texture cream around until it’s even. Seriously…that.is.it! You just need to let the cream dry…


….and your inexpensive prints now look like canvas!

The texture cream even prevents finger prints on the photos, and now you won’t see the reflective imperfections in your photos! I’ve heard there are other products that work for this too, but this is the only one that I have tried first hand. If you have any tips and tricks, feel free to leave them in the comments!
xoxo,
Brooke


Thanks for the tip Brooke! I actually have some texture cream, but never would have known to try this. Awesome!
So cool! Does the cream make the picture edges curl up?
love this – thank you !!!
Brooke, I went to the site you recommended to order the texture cream, but upon checkout found that shipping was almost as much as the product itself! Did you find a way around that? Any help would be appreciated! 🙂
I never would have thought of this! I am definitely going to give it a try!
Thank you for sharing!!! I love this!! By the way, your Twitter link above does not take you to your twitter account…I wasn't sure if you were aware of this. Just wanted to share…
~~~rhonda~~~
Kara, I was desperate! My kids' photos were driving me crazy!! I could see every little ripple in the print by the reflection of light. I figured it was worth the risk! Thanks for your commment! xoxo!
Mimi, nope it doesn't. Be careful not to put too much texture cream on though. I would say a small spoonful does a 16X20 print. If it got too wet it may start to curl.
Such a great idea! Where did you find the texture cream? Just a reg. hardware store? Or a craft store?
Thanks LuAnn!!
Great idea and super easy solution! I'll be pinning this, thank you!
Debbie 🙂
Nichole, I couldn't find it anywhere local, but if you live in a big city, you may have better luck. I would try an art supply store if you have access to one. Our local craft stores didn't have it. So, I actually bought mine directly from the website: http://www.gluefast.com/catalog/product_info.php?cPath=22&products;_id=33 If you find it at a store, please report back so I can help others find it too!
Nicki! I know!! I was shocked too, but I haven't found it anywhere else. I should have warned you, but I totally forgot! The bottle will last for a long time, and you could definitely share it with someone too!
I love this idea! Oh and I tried the link at the top of the page for your twitter account and it didn't work for me either….
Rhonda,
The one up in my menu bar? I just tried it and it worked for me. If you get this message can you confirm that's where it was giving you trouble? Thank you so much for the heads up.
For those of you unable to find the texture cream, you can also get the same effect from Mod Podge. I used the puzzle saver one and it came out amazing! Be aware it is white when you paint it on , but it dries clear with just the right amount of canvas looking texture.
Thank you! I wonder what's going on! I'll figure it out!!
great idea Brooke! way easier then transferring an image onto a canvas. can't wait to see who makes the cut for CWTS. Selfishily I am so hoping to make it! I'd love to be partnered with any of you lovely STARS!
I've tried mod pigeons before but it curled the photo. Boo!
Haha! "Mod pigeons". Spell check! I meant "mod podge"
HAHAHA!!! Mod pigeons. I snotted myself. Thanks for the unintentional laugh. So funny.
Pinning this! We are getting professional pictures of our family next month and I would love to do this with them!
What other uses are there for the texture cream? I would hate to buy the whole container and only use a small amount of it.
Thank you Lori! I bet most of us have Mod Podge already! I will try it and report back if it gives the exact same affect or not. Thanks again for the heads up!
Thanks Debbie!
If you live in Salt Lake, they used to sell it at The Wood Connection craft store. Not sure if they still do, but I would think so.
I just bought some a few weeks ago at the wood connection. It was $8.99 for a small jar maybe 4oz.
I have a friend who does this all of the time with Mod Podge. Another idea she has done, is cute a piece of wood the size of her picture and then coat the picture (while it is on the wood) and the edges of the wood with Mod Podge. It.was.awesome. I am totally doing it for Mother's Day gifts this year for the Grandma's. Oh, and it totally looks like a canvas. So Mod Podge might be easier to find for some and will give the same effect! 🙂
What modge podge does she use , there are so many different ones
I love the idea because I have a lot of photos that I would like to hang on my wall!!! Thank you, Brooke!!!!!!
I've never heard of that product before, how cool! Canvas prints are ridiculously overpriced!!
Wunda!!! I was cracking up at your "mod pigeons." HA!!! xoxo
It's a perfect option! Good luck!
Good luck on CWTS!! There are a TON of talented projects this year! xoxo
I have only used it to add texture on crafts until now. I'm sure there are other uses, but this is all I've done with it.
Melissa! Thank you for posting this! No I don't live in SLC, but I will update the post. I live in St. George. 🙂
Cute idea!
Thanks for your cute comment. It made a huge difference for me. Now I don't get bugged at every little imperfection in the picture reflection!
I know! My canvas a few years ago was almost $100! This is a much better option!
Brooke – that is a fantastic idea. I know that canvas prints can be a bit of an investment. I know because I work for Canvas Press and that is what we specialize in. But we also love the ingenuity and creativity that people have and that's why I am writing. Great job. Let me know if there is anything I can ever help you out with. – Eric – http://www.canvaspress.com
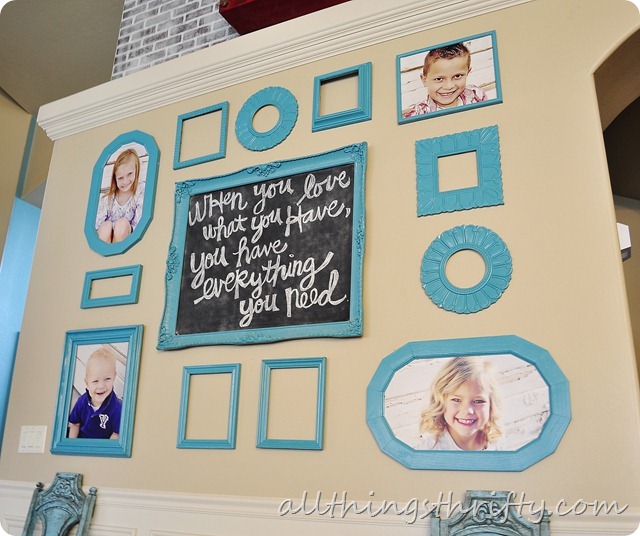
Such a cute idea! We just bought a really nice camera and have taken some gorgeous pics, but I've been hesitant to order the nice canvas prints because of the price so this is so exciting for me! I see you have those adorable blue frames around your pictures. How did you do those? Just cut and paint pieces of wood? That might be a stupid question but I'm a total virgin to this DIY stuff!
You are so talented! I love your picture wall. What is the brand and color of the paint on the wall behind the pictures? I need a good neutral color and yours is beautiful!
The color behind the photos is Sherwin Williams Nomadic Desert. Thank you!
I actually bought all of those frames and just painted them. Now that I look at the frame again I can totally see what you mean. But, all the frames were bought or given to me from friends and then just painted. If you want to see that post, here it is: https://allthingsthrifty.com/2012/06/gallery-wall-installation-complete.html
I’ve researched this glu-fast product before. I went to Reuel’s (an art store in SLC) asking what texture creme is and told them about the glu-fast product. They assured me that it is actually similar to or IS Matte Medium that is sold in any craft store in the art section. Liquitex and Golden are 2 brands that I’ve tried and they work amazingly. Super easy to find in any city, not to mention highly affordable (especially since most places offer a 40% coupon). You can brush it on or I prefer rolling with a foam roller to give it that perfect, light textured feeling. One is slightly thicker than the other but both work great!
That is great.
I am wanting to do something like this as gift for a coach but I want the team to be able to write/sign over the photo on the canvas do you think that would work with a permanent marker or some sort??
I don’t know! I feel like permanent marker would bleed. I would definitely try it first to see how it does.
I am ordering a 36 x 24 print and would love to try this technique. Do you recommend just buying the print or having them laminate it first?
I’ve never done it on laminated photos. I’ve only done it directly on the print. It works great without laminating it, so I’d say save the extra expense. 🙂